2010 DR650SE Oil and Filter Change - Page 1
Applicable to other model years
Article Last Updated: Jan 12, 2026Next
This is a step-by-step guide to changing the engine oil and oil filter on a Suzuki DR650SE. It is based on the author’s observations and experience changing the oil and oil filter (multiple times) on a 2010 DR650SE and on information contained in the official Suzuki DR650SE service manual, 2009 (part no. 99500-46072-01E) which covers model years 1996 - 2009. The author is not aware of any relevant mechanical changes to the DR650SE for the model years 2010-2026, so this guide should apply to those as well.
Disclosure: While the author has attempted to provide correct and complete information, sometimes errors or omissions may occur. By using this document and following the procedures and suggestions below, the user assumes all risk and responsibility for injury or damage to their motorcycle. The author has been servicing motorcycles for many years (not as a profession) and is mostly self-taught (no formal training in motorcycle servicing). It is recommended that you consult the Suzuki DR650SE owner’s manual and/or service manual.
By learning to change the oil and oil filter, you can save money, learn more about your bike, gain the satisfaction of maintaining your bike yourself, as well as saving yourself a lot of inconvenience by having to take your bike to a dealer. There is nothing technically challenging about the procedure. Use the correct tools and supplies for the job, and take your time. Read all of the instructions before beginning.
Parts, supplies and other items you may need
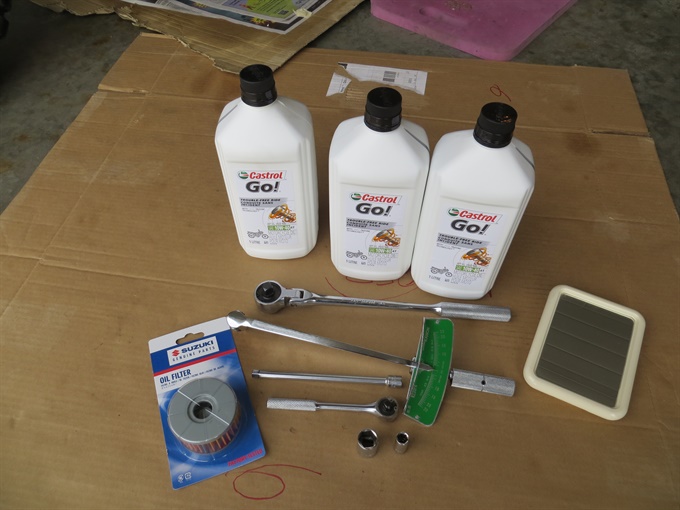
- 10W-40 motorcycle oil (2.4 litres)
- new Suzuki OEM oil filter
- new O-rings (2) for oil filter and oil filter cover
- new sealing (crush) washer for oil drain plug/bolt
- funnel for pouring oil into engine (optional for oil in 1 L containers)
- funnel for pouring dirty oil into containers for disposal
- rags and/or shop towels
- disposable gloves (nitrile)
- oil drain pan
- newspaper or cardboard to protect floor from spills
- newspaper and tape to redirect oil from oil filter housing once opened
Tools you need or may find helpful
- torque wrench accurate for 5 to 23 N.m
- 3/8-inch drive: 17 mm socket and ratchet or flex bar for the oil drain plug. (I have an after-market magnetic drain plug that requires a 14 mm socket)
- 1/4-inch drive: 8 mm socket, ratchet and a 3-inch or 6-inch extension for the oil filter cover bolts
- possibly a pick or small flat blade screwdriver for removing the oil filter cover O-ring
- possibly a flat blade screwdriver for loosening the oil drain plug sealing (crush) washer if stuck to engine case
- possibly a 3/8-inch to 1/4-inch drive adapter for torque wrench or ratchet
Information From Suzuki DR650SE Service Manual
Recommended service intervals for oil and oil filter replacementInitial: 1000 km (600 mi) / 2 months oil and filter
Then: every 6000 km (4000 mi) / 12 months for oil change, and 12000 km (7500 mi) / 24 months for oil filter replacement
Torque Specifications:
Oil Drain Plug Torque Spec: 23 N.m (16.5 lb-ft)
Oil Filter Cover Bolt Torque Spec: not specified in the service manual
6 mm bolt: 5.5 N.m (4 lb-ft). This is what I use for the oil filter cover bolts.
For reference, cylinder head cover bolt: 10 N.m (may be too much for oil filter cover bolts)
For reference, crankcase bolt: 11 N.m (may be too much for oil filter cover bolts)
Recommended Oil
Type: API SE, SF or SG motorcycle oil
Viscosity: SAE 10W-40
Oil capacity after draining with filter replacement: 2.4 L (2.5 US qt)
Oil capacity after draining without filter replacement: 2.3 L (2.4 US qt)
Service Manual Instructions
- The engine should be warm when changing the oil.
- The oil should be replaced when the oil filter is replaced.
- Keep the motorcycle upright with a jack or wooden blocks.
- Place a drain pan under the engine to catch the oil.
- Remove the oil drain plug and oil filler cap to drain the oil.
- Remove the oil filter cap by removing the three bolts.
- Remove the oil filter and install a new one.
- Note: Use new O-rings when replacing the oil filter. Apply a light coating of engine oil to the oil filter cap O-ring. Check that the O-rings and spring are positioned correctly and install and tighten the cover bolts securely.
- Reinstall the oil drain plug securely (23 N.m, 16.5 lb-ft).
- Pour in the specified type and amount of oil.
- Install the oil filler cap.
- Start up the engine and let it run for several minutes at idle speed.
- Turn off the engine and wait about one minute. Check the oil level in the inspection window. If the oil level is below the full mark, add oil to the full mark.
Go to the next page for more detailed instructions and photos.
Next