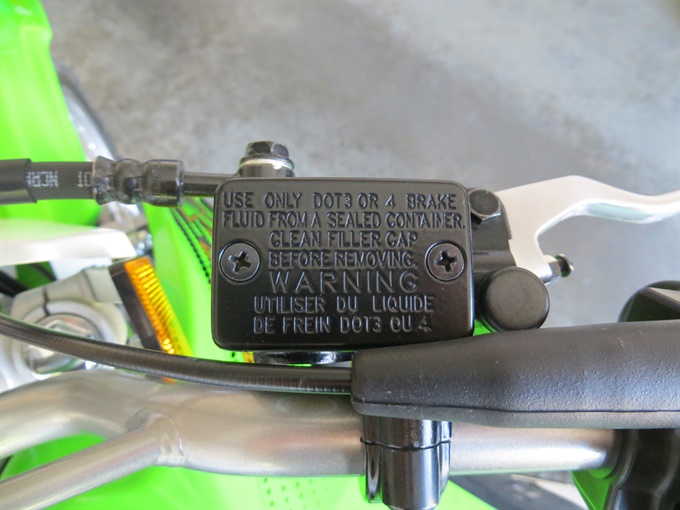
2020 Kawasaki KLX140 Brake Fluid Replacement - Page 1
Article Last Updated: August 18, 2024Next

This is a step-by-step guide to replacing the brake fluid on a Kawasaki KLX140. The information on this page is based on information contained in the official Kawasaki KLX140 service manual, 2020 (part no. 99924-1390-14) which covers model years 2008 - 2021 and models KLX140A/KLX140/KLX140R, KLX140B/KLX140L/KLX140RL and KLX140C/KLX140G/KLX140RF. The author is not aware of any relevant mechanical changes to the KLX140 models for the model years 2022-2024, so this guide should apply to those as well. Check with a Kawasaki dealer if in doubt or get the latest version of the service manual.
Disclosure: While the author has attempted to provide correct and complete information, sometimes errors or omissions may occur. By using this document and following the procedures and advice below, the user assumes all risk and responsibility for injury or damage to their motorcycle. The author has been servicing motorcycles for many years (not as a profession) and is mostly self-taught (no formal training in motorcycle servicing). It is recommended that you consult the Kawasaki KLX140 owner’s manual and/or service manual.
KLX140A / KLX140 / KLX140R: model with 17”/14” wheel combinationKLX140B / KLX140L / KLX140R L: model with 19”/16” wheel combination
KLX140C / KLX140G / KLX140R F: model with 21”/18” wheel combination
Information from Kawasaki KLX140 Service Manual
Recommended service interval for brake fluid replacementEvery 2 years
Torque Specifications
Front and rear caliper bleed valve: 7.8 N.m (69 in.lb)
Front and rear reservoir cap screw: 1.5 N.m (13 in.lb)
Service Manual Warnings
- don't reuse old brake fluid
- do not use brake fluid from a container that is unsealed or has been open for a long time
- do not mix types or brands of brake fluid (do a complete fluid replacement if switching)
- do not leave the brake fluid reservoir cap off for any length of time
- do not replace the fluid in the rain or if windy
- use only brake fluid, isopropyl alcohol or ethyl alcohol for cleaning brake parts except the brake pads and disks
- avoid getting brake fluid or oil on the brake pads and disks; use high flash-point solvent that does not leave an oily residue to clean disks; replace brake pads if they cannot be adequately cleaned
- brake fluid damages painted surfaces and some plastics; clean up spills/drips immediately
- if the bleed valve or any brake line fittings are opened or loosened, air must be bled from the brake line
Service Manual Instructions for Brake Fluid Replacement
The same procedure applies to both front and rear brakes.
- Level the brake fluid reservoir.
- Remove the reservoir cap and diaphragm by removing the screws.
- Remove the rubber cap on the brake caliper bleed screw.
- Attach a clear plastic hose to the bleed screw, and insert the other end of the hose into a suitable container.
- Repeat the following 4 steps until fresh brake fluid comes out of the plastic hose. Add fresh brake fluid to the reservoir and do not let the level get too low.
- 1. Open the bleed valve.
- 2. Apply the brake and hold it.
- 3. Close the bleed valve.
- 4. Release the brake.
- Note: check the brake fluid level frequently and add fluid as needed. If the brake fluid level reaches the bottom of the reservoir, air will be pumped into the brake line; the brakes will then need to be bled to remove the air.
- Remove the clear plastic hose.
- Tighten the bleed valve to 7.8 N.m (69 in-lb), and install the rubber cap.
- After changing the brake fluid, check the brake operation. There should be good braking power, no brake drag and no leaks. If necessary, bleed the brakes.
Warning: air in the brake lines reduce braking performance. If the brake lever or pedal feels spongy, there may be air in the system, or the brakes may be defective. Do not operate the bike until the issue is resolved.
- Remove the reservoir cap, and ensure that there is plenty of brake fluid. Add fluid as needed.
- With the reservoir cap off, slowly pump the brake lever several times until no air bubbles can be seen rising up through the fluid from the holes in the bottom of the reservoir.
- Attach a clear plastic hose to the bleed valve on the caliper and place the other end into a container.
- Repeat the following 3 steps until no more air can been seen coming out of the hose.
- 1. Pump the brake lever until it becomes hard, apply the brake and hold it.
- 2. Quickly open and close the brake bleeder valve while applying pressure on the brake lever.
- 3. Release the brake lever.
- Notes: Do not let the brake fluid get too low. Tap the brake line from the caliper to the reservoir for easier bleeding.
- Remove the clear plastic hose.
- Tighten the bleed valve to 7.8 N.m (69 in-lb), and install the rubber cap.
- Check the brake fluid level. Add fluid if needed. Install the reservoir cover.
- Check brake operation. Check for leaks.
Hold the reservoir horizontal when checking the brake fluid level.
The brake fluid level in the reservoir must be kept above the lower-level line. Add brake fluid if required: add fluid to the upper-level line.
Next