2023 Honda CRF300L Chain Adjustment - Page 2
Previous
Road and Trail Guide
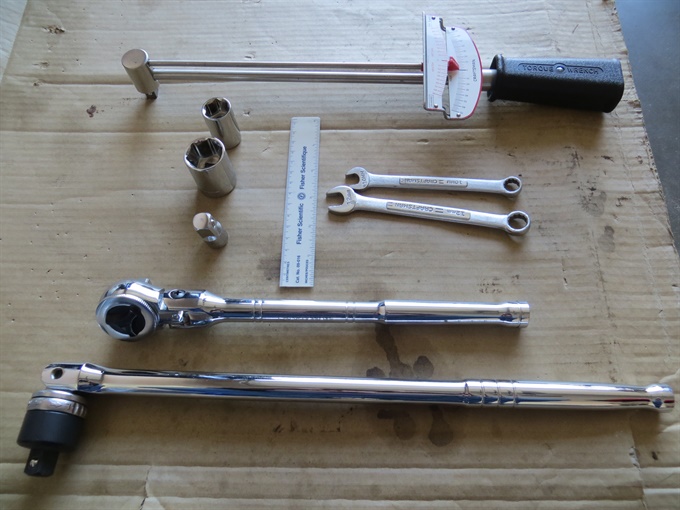
Read all of the instructions before beginning. Refer to Page 1 for list of tools and supplies.
It is important that the chain slack is correct. If a chain is too loose, there is a risk of the chain coming off the sprockets which could cause damage to the motorcycle, especially the engine case; even more important, having a chain come off the sprockets could cause the rear wheel to lockup which may cause you to crash. An overly loose chain will result in increased driveline lash (jerky ride when transitioning on and off the throttle). A loose chain may also cause damage to other parts of the motorcycle like the frame even if it does not come off the sprockets. A too tight chain may restrict rear suspension movement as well as put extra stress on the transmission and the output shaft bearing. A too tight chain may also result in increased wear of the chain and sprockets.
Torque Specifications
Rear axle nut: 88 N.m (65 lbf.ft)
Chain adjuster locknut: 27 N.m (20 lbf.ft)
Chain Slack Specifications
CRF300L/LA: 50 - 55 mm (2 - 2 1/4 in). Do not ride the motorcycle if slack exceeds 57 mm.
CRF300LDA: 45 - 50 mm ( 1 7/8 - 2 in). Do not ride the motorcycle if slack exceeds 52 mm.
It is important that the chain is well lubricated and there are no kinked or binding links in the chain prior to measuring the chain slack, otherwise the measurement will be inaccurate. If the chain is excessively dirty, consider cleaning (and lubricating) the chain first. I use kerosene to clean the chains on our motorcycles. I have tried several different commercial motorcycle chain lubricants over the years, but I prefer to use gear oil instead.
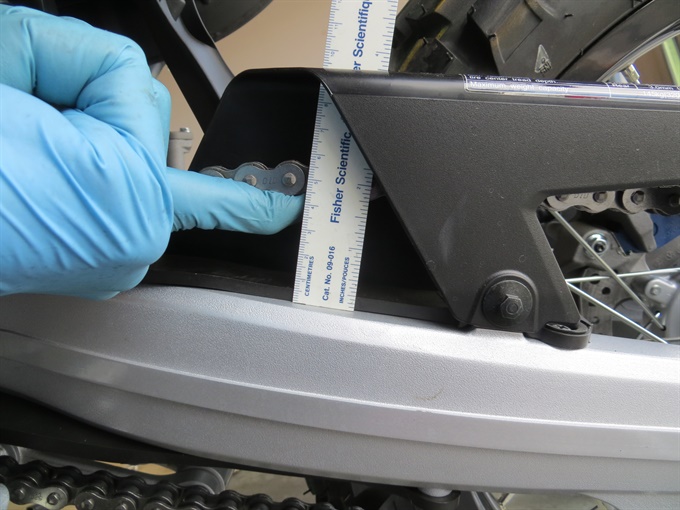
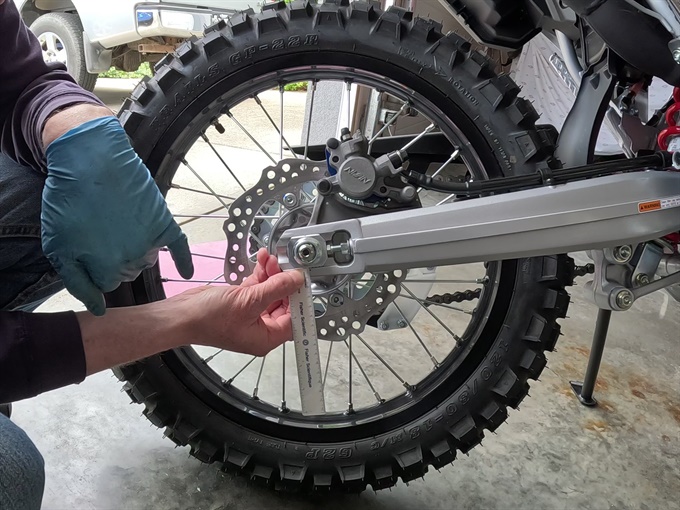
Chain slack is measured by inserting a small ruler through the slot in the chain guard until it makes contact with the swingarm (not the chain slider). The ruler should be perpendicular to the swingarm. Pull up on the chain and measure the distance from the swingarm to the midline of the chain (centre of a rivet on a side plate).
Ideally, the chain slack would be the same at all points, but in reality, this will likely not be the case. Chain slack is typically adjusted at the tightest point (least amount of slack) of the chain. What you need to do is to measure the chain slack at multiple points along the chain. Either push the bike a short distance (or lift up the rear wheel with a jack or stand and rotate the rear wheel) between chain slack measurements. Take several measurements to determine the least amount of chain slack. You will adjust the chain, if necessary, at the tightest point (the motorcycle is positioned so that the chain slack is the least with the motorcycle in this position).
Chain slack is to be determined with the motorcycle leaning on the side stand on level ground, so if you lifted the rear wheel off the ground to determine the tightest point in the chain, you need to measure the chain slack again with the bike unsupported by a lift or jack, with the rear wheel and chain in the same position, and resting completely on its tires and side stand. It is important that the motorcycle in on level ground when measuring chain slack. If the surface is sloped, even slightly, the bike may lean more or less than if it was on level ground; this will affect how much the suspension is extended/compressed which will affect the chain slack measurment. Likewise, if the suspension is modified, or if there is a load on the motorcycle, the chain slack measurement will be affected.
If the chain slack is outside the specified range (see above), the chain slack should be adjusted.
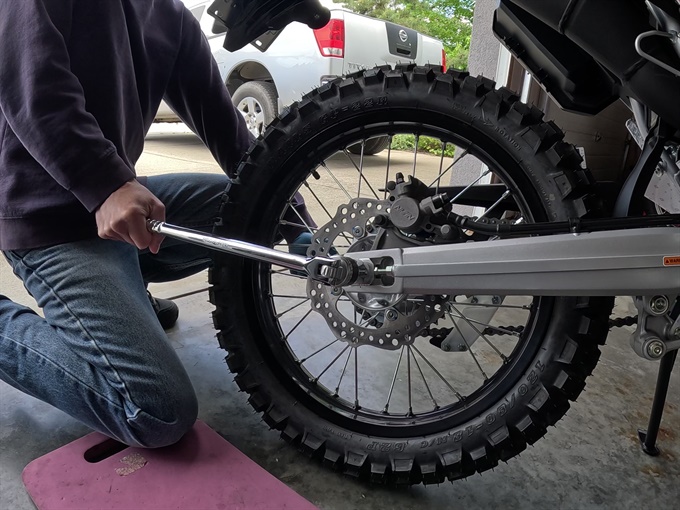
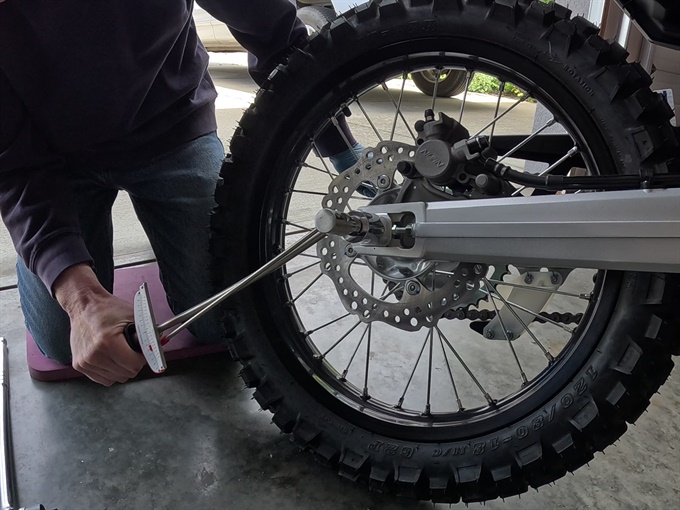
Loosen-up the axle nut (24 mm) on the right side. It will be easier if you use a breaker bar or long handled ratchet and socket on the axle nut (while preventing the axle from rotating with a 17 mm wrench or ratchet and 17 mm socket on the left side). Just loosen the axle nut a few turns at most.
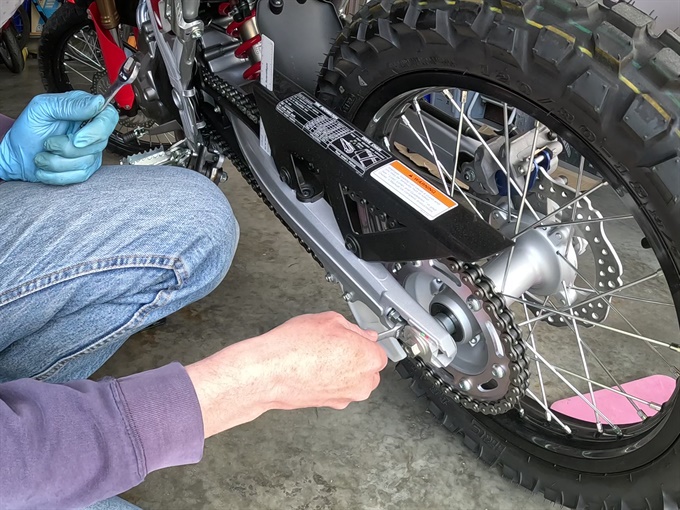
While using a 10 mm wrench to keep the each adjuster bolt from turning, use a 12 mm wrench to loosen the adjuster locknuts.
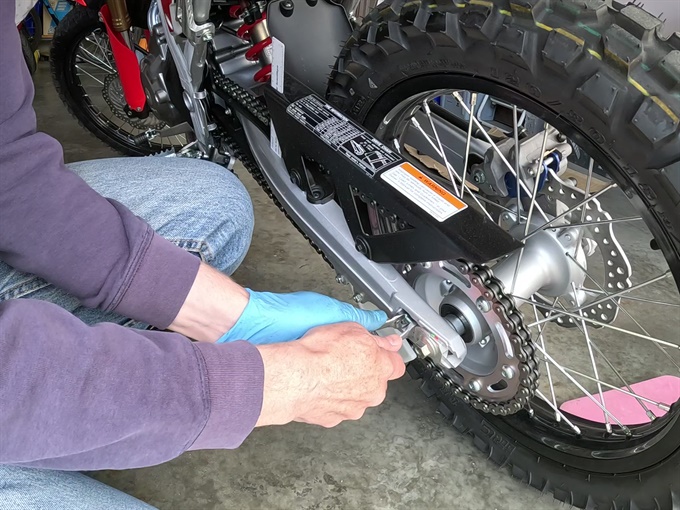

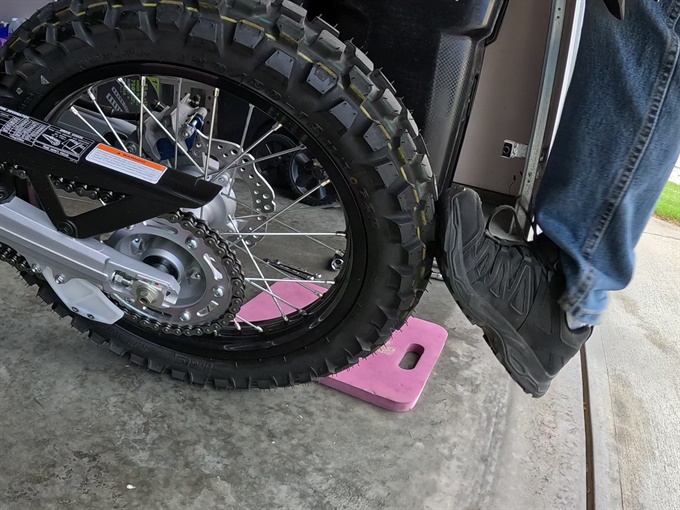
Assuming that the wheel is properly aligned, turn each chain adjuster bolt the same amount (1/8 to 1/4 turn is usually enough) starting on the chain side. Threading the chain adjuster bolts out will push the axle back and reduce chain slack; threading the adjuster bolts in will do the opposite. If turning the chain adjuster bolts in, you may need to push the wheel forward so that the chain adjusters are tight against the chain adjuster bolts. I usually give the rear tire a bit of a kick from behind the bike (pushing the wheel forward). Another technique to push/pull the rear wheel forward is to place a rag between the rear sprocket and the chain where they make contact at the bottom, and try to rotate the wheel forward (or push the bike forward a bit); the rag will cause the chain to be pulled tight, thus pulling the wheel forward as the rag is caught between the chain and sprocket. The chain guide (or a sprocket guard) may be in the way to do this, though. Remember to remove the rag afterwards (rotate the wheel backwards).
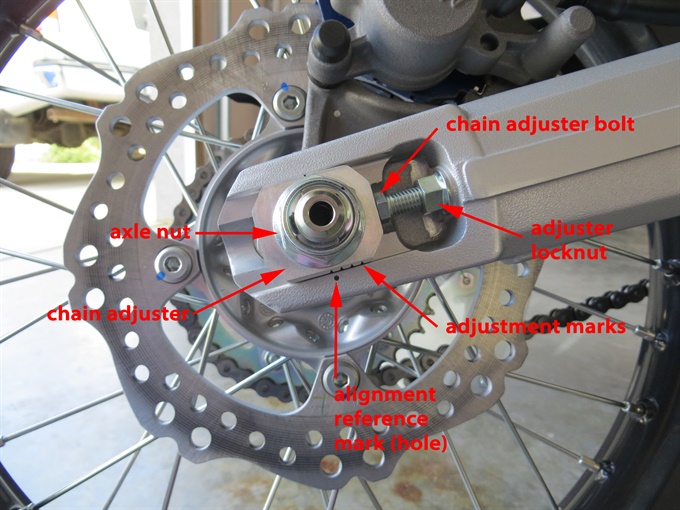
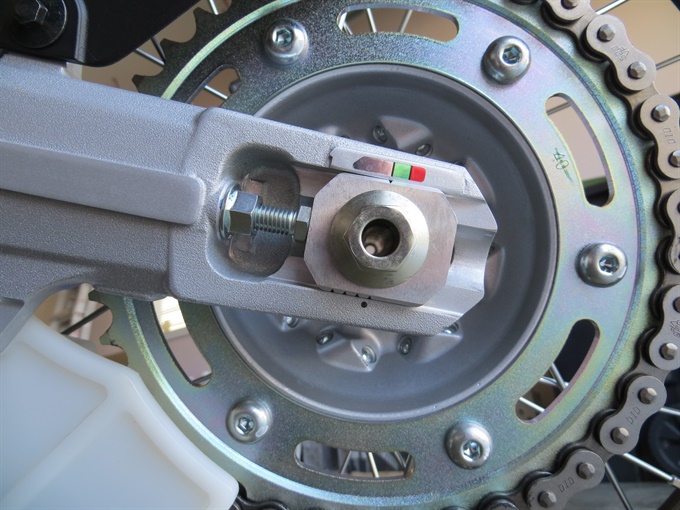
Check that the reference marks on the lower edge of each chain adjuster align with the alignment mark (small hole in swingarm) equally on each side to ensure that the rear wheel is properly aligned (wheel pointing straight). If the alignment is off, correct it by turning the chain adjuster bolts. It is awkward viewing the alignment marks on the chain side unless the bike is elevated on a work stand / platform; it would have been easier if the alignment marks on the chain adjuster and swingarm were above the axle instead of below it.
Check the chain slack. If the chain slack is good (within spec), tighten-up the chain adjuster locknuts while using a wrench to prevent the chain adjuster bolts from turning. If the chain slack is too great or too small, readjust it, ensuring correct alignment like above.

Once the chain slack is good, rear wheel alignment is good, and the adjuster locknuts are tightened, tighten the rear axle nut, but still less than the full torque spec. Prevent the axle from rotating by holding the left end of the axle with a wrench or socket and ratchet.
Recheck the chain slack and wheel alignment (check alignment reference marks on both sides).
If everything looks good, tighten the axle nut to specification (88 N.m or 65 lbf.ft); otherwise readjust. Do a final check of the chain slack and alignment.
All done!
Previous