Winterizing Your Motorcycle - Preparing It For Storage
Article Last Updated: Dec 11, 2023Disclosure: While the author has attempted to provide correct and complete information, sometimes errors or omissions may occur. By using this document and following the procedures and advice below, the user assumes all risk and responsibility for injury or damage to their motorcycle. The author has been servicing motorcycles for many years (not as a profession) and is mostly self-taught (no formal training in motorcycle servicing). It is recommended that you consult your owner’s manual and/or service manual for information specific to your motorcycle.
The purpose of preparing your motorcycle for storage is to limit deterioration while it is not in use. Proper preparation will help ensure that your motorcycle is in optimal condition when you return it to service. If you were to simply park your bike for six months without prepping it first, likely you would have trouble getting it to start and/or to run properly later; the finish on your bike may have also deteriorated. A little preventative maintenance will go a long way to preserve your bike’s condition. There’s not that much you need to do, though it can be labor intensive and time consuming if you have multiple motorcycles to winterize.
Before putting your motorcycle away for the season, you may also wish to perform any other maintenance that it requires such as checking fasteners, lubricating cables and pivots, cleaning or replacing the air filter, changing brake fluid, etc. Again, you should consult your owner’s manual and / or the service manual for information specific to your motorcycle.

Summary
You can vary the order of some of the following steps. At the absolute minimum, drain the carburetor(s) if the motorcycle is carbureted, and if the motorcycle is fuel-injected, or at least has a fuel pump, run stabilized fuel through the fuel system.
- Add fuel stabilizer to the fuel tank and fill it (preferably with ethanol-free gas.)
- Wash and dry the motorcycle. Wax painted surfaces like the fuel tank.
- Address any outstanding issues.
- Change the oil and oil filter.
- Check the coolant if applicable.
- Run the engine to complete the drying process of the motorcycle (after washing), to circulate fresh oil (after changing) and to circulate fuel through the fuel system after adding and mixing-in fuel stabilizer.
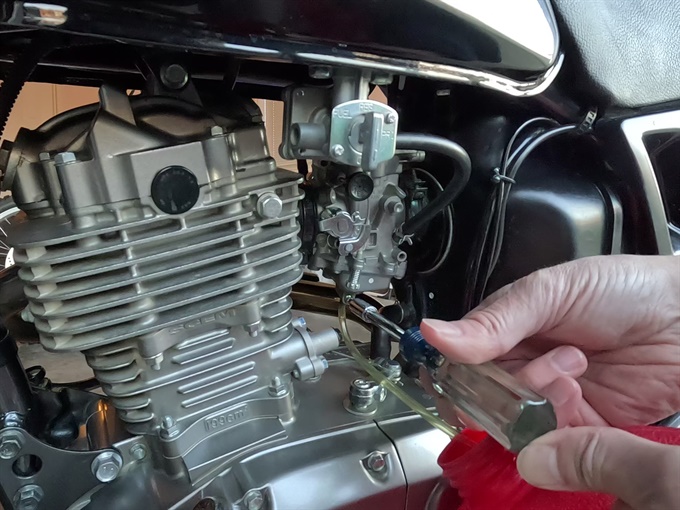
- Drain the carburetor(s) if the motorcycle is carbureted.
- Lubricate the chain if it has one.
- Remove the battery (disconnect the negative wire first). Charge it once a month.
- Wipe down the inner fork tubes and maybe some other plated metal components (not the brake disks) with WD-40 or light oil to prevent corrosion.
- Air-up the tires.
- Store the motorcycle in a dry place with a cover over it.
The Steps in Detail
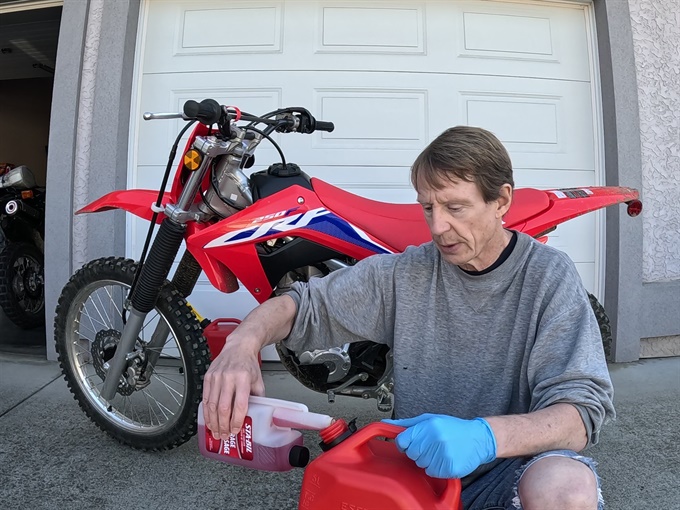
Add fuel stabilizer. I've been using Stabil brand fuel stabilizer for many years with good success. I also store our motorcycles with ethanol-free gas, even if that means draining the gas tanks first. Ethanol is hard on fuel systems. Either add the stabilizer directly to the gas tank (with some gas in it) or premix it with gas in a gas can and then add it to the gas tank. The label on the fuel stabilizer container should indicate the proper ratio of stabilizer to gas. You will need to know the capacity of the bike’s gas tank. I prefer to premix, add the concentrated stabilized gas to the tank and then slosh it around by rocking the bike back and forth while holding the front brake lever. Mostly fill up your gas tank, but don’t completely fill it yet, then rock the bike back and forth to mix some more. Top up the fuel tank after you have run it for the last time.
If you prefer to drain your fuel tank prior to storage (such as for storing the bike inside, or storing the bike for a very long time), and if you have a metal gas tank, it may be a good idea to coat the inside of the empty tank with engine oil to prevent the formation of any rust. Note that it may not be practical to completely drain the fuel systems on some motorcycles, so it may still be necessary to run stabilized fuel through the fuel system prior to draining the tank (consider the fuel pump, fuel lines, and fuel injectors). If you're going to drain your gas tank, don't do it just yet.
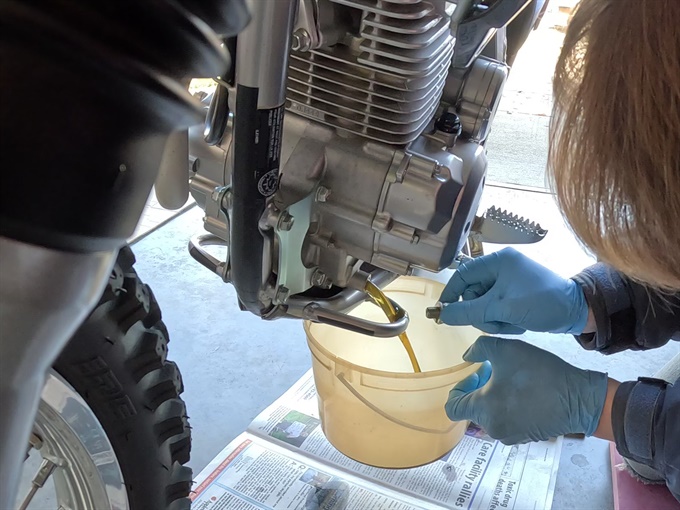
Change the oil and oil filter. Refer to the owner's manual and/or service manual for your motorcycle. Run the engine for a few minutes just prior to draining the oil. The main reason for this is to resuspend any sediment in the engine so it drains out with the oil. Warm oil also drains faster.

Some bikes have a very long service interval for the oil and filter. For example, the DR200SE factory service manual states a replacement interval of 15 months or 5000 km (I wouldn't go that far) for the engine oil and a replacement interval of 30 months or 10,000 km (again, I wouldn't go that far) for the oil filter (with shorter intervals for extreme use). In this particular example, it might be fine to skip the oil filter replacement if the bike hasn't been used much since the last oil filter change and you're still well within the service interval, but I would at least change the oil before putting the bike away. Run the engine at some point after the oil change and before putting it away so that fresh oil is circulated through it.
Wash the bike well, and dry it well too. Dirt retains moisture which will hasten corrosion. I run the engine on my motorcycles after washing to complete the drying process. I run the engine long enough to heat up the engine and exhaust system. I also ride the motorcycle a short distance to fling water off the chain and apply the brakes a few times to dry them completely. If the (glossy) painted surfaces have not been waxed recently, now would be a good time to do so.
If the bike has chain drive, lubricate it well. I prefer to use gear oil. I've tried a number of motorcycle chain lubes, but I always go back to gear oil. If the chain needs cleaning, then consider cleaning it (and the sprockets) now and prior to lubricating it. I use kerosene, a tooth brush and rags to clean chains. Wear disposable gloves and old clothes as it's a messy job. You'll likely need to clean your rear brake disk afterwards; use brake cleaner because it doesn't leave any residue. You might as well check the chain slack while you're at it, and adjust the chain if needed.
If you have a liquid cooled bike, and the bike will be stored in extremely cold temperatures, you may want to check the coolant and/or replace it to ensure that it will not freeze (refer to your owner’s manual).
Do this step after the fuel stabilizer has been added to the gas tank and the tank is nearly full. You can do this step after washing the motorcycle or after changing the oil, or after both are completed. Run the bike long enough after the fuel stabilizer has been added and mixed in so that stabilized fuel makes it through the entire fuel system. The time required for this will vary from bike to bike. I prefer to ride my bikes that have fuel injection and/or a fuel pump for at least 10-15 minutes (depends on the bike). A bike with a simpler fuel system, like one with a gravity fed carburetor, does not need to be run as long, really it just needs to be run long enough to bring the engine up to operating temperature (and heat up the exhaust system) after washing the bike to help dry it out and to limit the amount of condensation in the muffler(s) before putting it away.
If, for whatever reason, you are not going to run the engine on a motorcycle with a carburetor after adding fuel stabilizer to the gas in the fuel tank, drain the carburetor(s), prime (refill) them, and then drain them again to ensure that stabilized fuel makes it through the fuel system. To prime the carburetor(s) that are gravity-fed, just turn the petcock (fuel valve) to the on or prime position (depending if the petcock is vacuum operated). If the carburetor(s) depend on a fuel pump, then you'll likely need to turn on the ignition system to power the fuel pump to prime the carburetor(s).
If the motorcycle is going to be stored for a very long time, it’s not a bad idea to pour a bit of engine oil, or spray fogging oil, into each cylinder through the spark plug hole. You'll of course have to remove the spark plug(s) first. Afterwards, turn the engine over a few times, and then reinstall the spark plug(s). Consult your owner’s or service manual for the proper procedures of removing and reinstalling the spark plugs and turning the engine over. Do not run the engine again after this step until returning the motorcycle to use after storage.
Do this step after running the engine for the final time. If the bike is carbureted, drain the carburetor(s) if you haven't already done so. If gas is permitted to remain in the carburetor(s) for an extended period of time, a varnish like residue will form in it (them), and if that happens the carburetors(s) will likely have to be removed and cleaned later. A week or so later try to drain your carburetors again. Some fuel may have leaked past the petcock (fuel valve) or drained from the fuel line into the carburetor. If your bike has a vacuum operated petcock, this is particularly relevant.

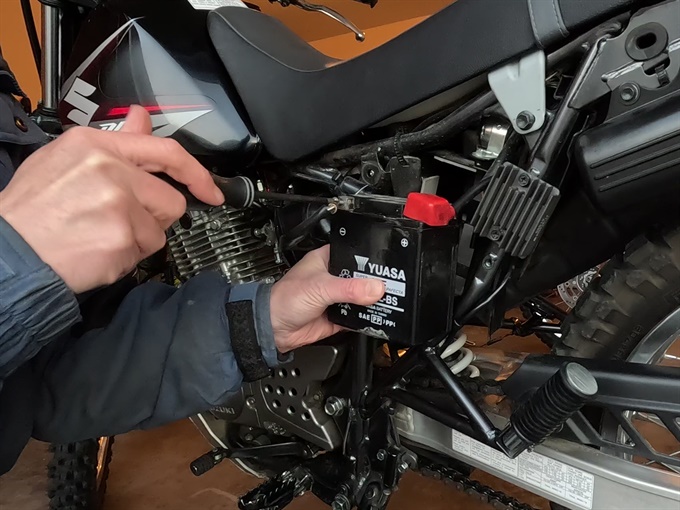
Remove the battery if it has one (see owner’s manual). Disconnect the negative wire first. The Honda Common Service Manual gives this warning: "Disconnecting the positive (+) cable first could cause an accidental direct short if the tool used to loosen the terminal contacts the frame. The spark could ignite or damage the battery." Store the battery in a cool, dry place. It should be charged up at least once a month while not in use. Use a battery charger/maintainer suitable for motorcycle batteries.

Top up the gas tank to the fill line which is often the bottom of the filler neck (if not storing with a completely drained fuel tank). This is to reduce the amount of air space in the tank which will help reduce the amount of condensation that may form in the tank. Water in a steel tank will cause it to rust.
Use a light oil or WD-40 to coat bare metal and chromed surfaces like a chromed exhaust system, the inner fork tubes, the filler neck of the gas tank and some fasteners and brackets, etc. to prevent them from corroding.
Inflate the tires to the recommended pressures, or a bit higher. Do not exceed the maximum pressure stated on the tire.
Park the motorcycle in a secure place where it won’t be as exposed to the elements. A heated garage would be ideal, but at least park it in a dry spot if possible. Put the motorcycle up on the centre stand if it has one or use a maintenance stand(s) to keep the tires off the ground during storage. If these are not options then I would suggest repositioning the bike every so often so that the bike does not rest on the same spot on your tires all the time. This is supposedly to help avoid flat spots on the tires. This may be a hold-over from the past, and I'm not sure if this is really all that important anymore, especially for shorter storage periods (it can't hurt, though). I've also read that it's not a good idea for the tires to be in contact with concrete (or damp surfaces) while storing the motorcycle; you could put pieces of wood under the tires if you don't have a stand to lift the tires off the ground.
I've read a suggestion to stuff an oily rag into the air box to prevent rodents from taking up residence in it. I suppose it depends on where you're storing the motorcycle. I've never done this, and I've never had this problem.
Cover the bike with a breathable cover (assuming that it's being stored in a dry place). One of our owner's manuals states to cover the muffler with a plastic bag to keep moisture out. Make sure the exhaust system has fully cooled first if you're going to do this.
To return your motorcycle to use after storing it...
- Wipe off any oil film and / or wash the motorcycle.
- Visually inspect the motorcycle and address any issues.
- Inflate the tires to the recommended pressures.
- If the motorcycle has been stored for a long time with gas in the tank, you may need to replace the gas with fresh gas. Gas degrades over time, even with fuel stabilizer (though not as fast). If you drained the gas prior to storage, you'll obviously have to add fresh gas in this case too.
- Install the battery after it has been fully charged (see your owner’s manual). Connect the positive wire first.
- If the engine has not been run for quite a while (like being stored for the winter), it may be a good idea to crank the motor for 10 seconds or so prior to starting it up in order to pump oil throughout the engine before subjecting the engine to any load. For a carbureted bike, this is easy to do: do not use the choke (choke in open position, knob pushed in), and ensure that there is no gas in the carburetor (previously drained, and the petcock (fuel valve) in the off position). For a motorcycle with fuel injection you might be able to crank the engine with the starter motor with the run switch (kill switch) in the off position. I've heard of another method for some fuel injected bikes (verify this first before trying on your bike): open the throttle completely before pressing the starter button. Supposedly the ECU will prevent the engine from starting. Warning: if the engine does start it could rev to the limit (high RPMs), which would be very bad for your engine, especially after sitting for months. If your motorcycle has a kick-starter, you can just turn the run switch to the off position and kick the bike over several times before trying to start it.
- Make sure all lights and controls are fully functional before you ride it.
- Test the motorcycle at low speed to verify that everything is good, especially the brakes.
- Ride safe, and have fun!