2010 Suzuki DR200SE Air Filter Service - Page 3
Previous
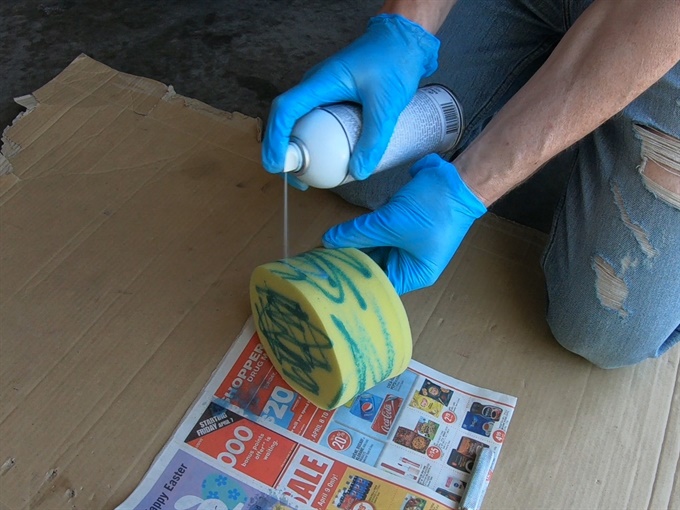
13. Once the air filter is completely dry, you can re-oil it. Follow the instructions on the air filter oil container. Generally, you either spray or pour the air filter oil (or motor oil) onto the foam air filter evenly and thoroughly, and then work the filter oil (or motor oil) into the foam by massaging the filter. Don't leave any dry spots. You can wear gloves or put the air filter in a clean zip-lock bag to keep your hands clean. Ensure that all the foam is well coated. If you used a large amount of filter oil (or motor oil), try to squeeze out the excess (again, don't wring-out or twist the filter).
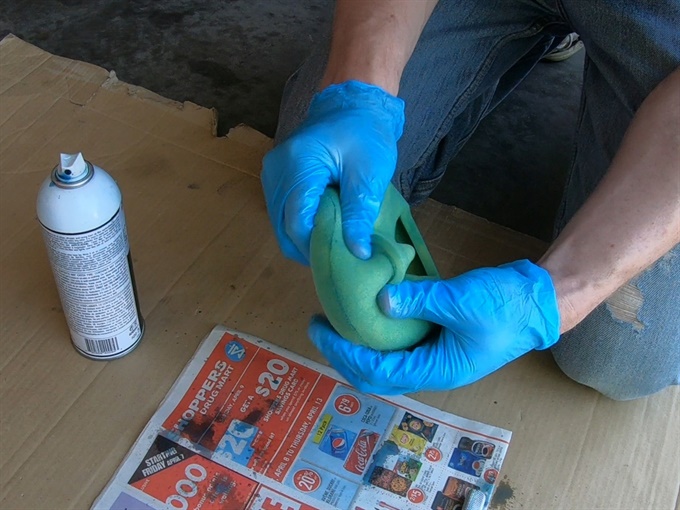
14. Install the air filter frame into the air filter element, aligning the small hole in the foam filter with the hole in the frame. Be careful not to tear the foam.
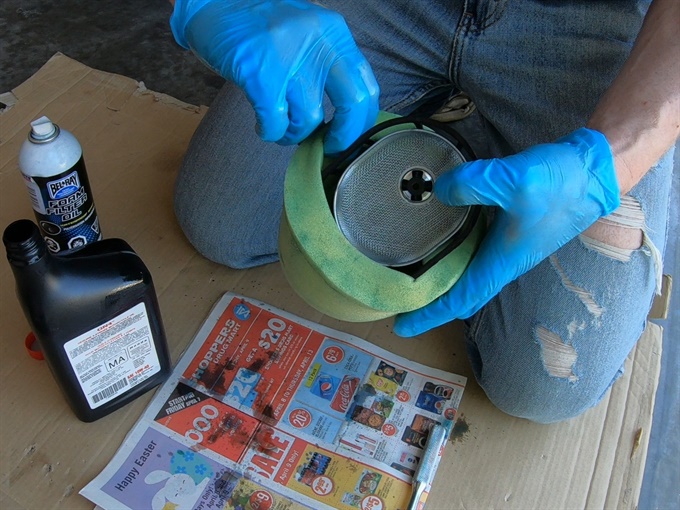
15. Insert the cleaned wing bolt part-way into the hole in the filter.
16. Apply a layer of the appropriate type of grease (general purpose grease if using motor oil or oil-base filter oil, otherwise, a special "grease" suitable for the type of air filter "oil" being used) to the air box where the foam air filter makes contact with it to seal against dirt making its way past.
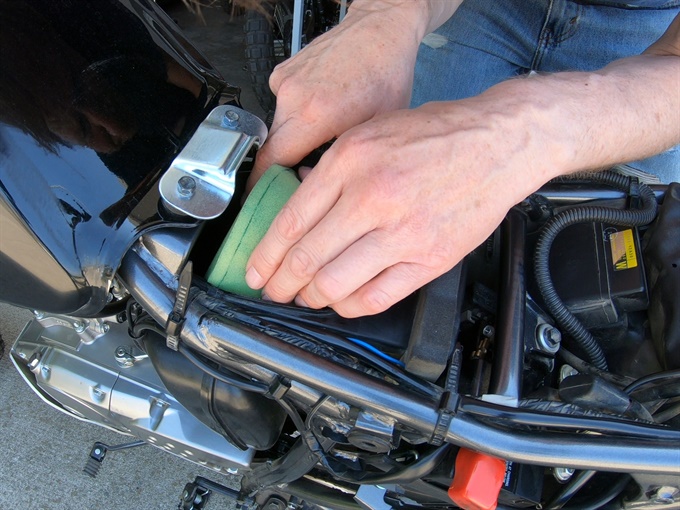
17. Install the air filter into the air box. There isn't a lot of room to get your hands in there, but you need to carefully position the air filter correctly so that it seats against the flat surface of the air box outside of the protruding part. Have a look inside the air box first. You have to feel your way through this step. Once positioned correctly, line-up and screw-in the wing bolt and tighten securely (hand tight, no tools). This is the fussiest part because can't see what you're doing.
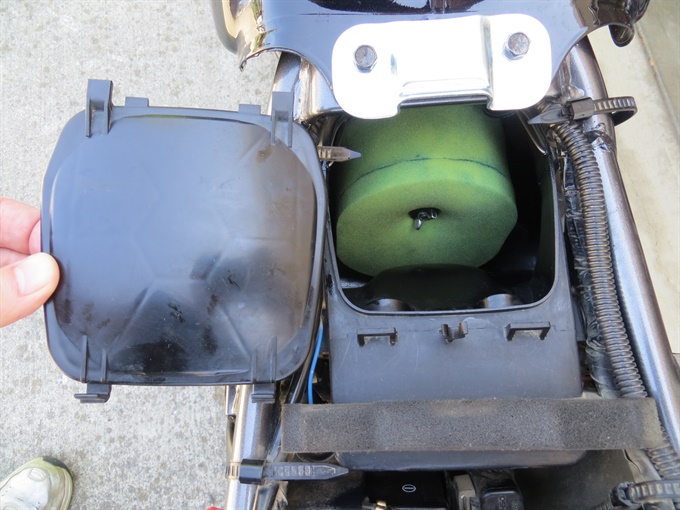
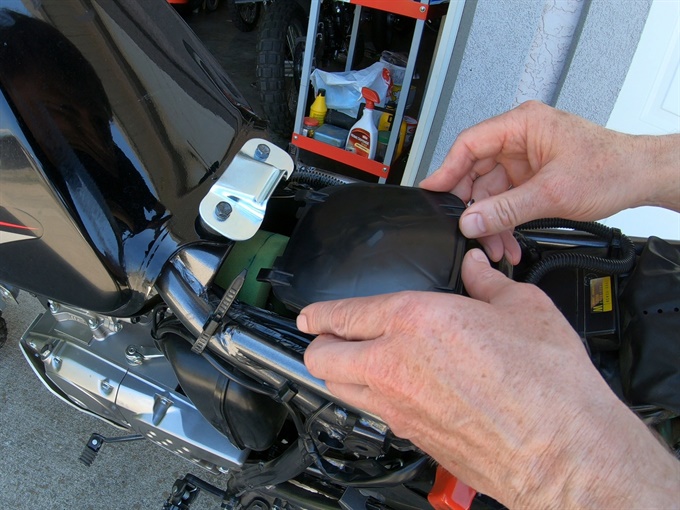
18. Install the air box lid. There are two tabs to the front (under the fuel tank) that you have to position. Ensure that the lid is in the correct position, and then snap the rear tabs in place. If you loosened up the two zip ties, cinch them up.
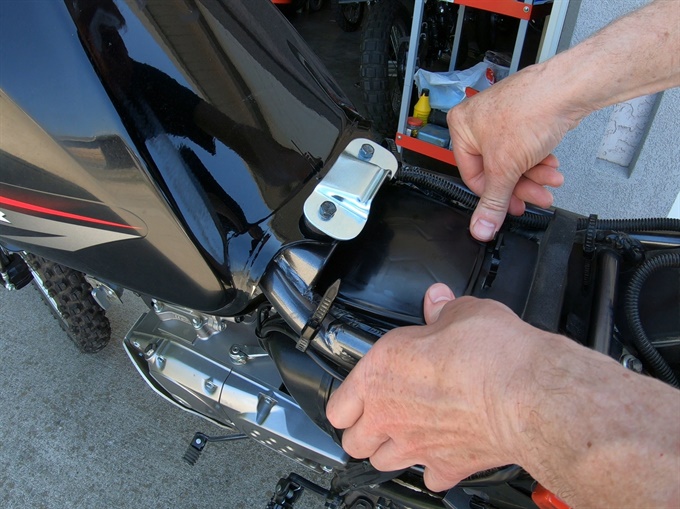
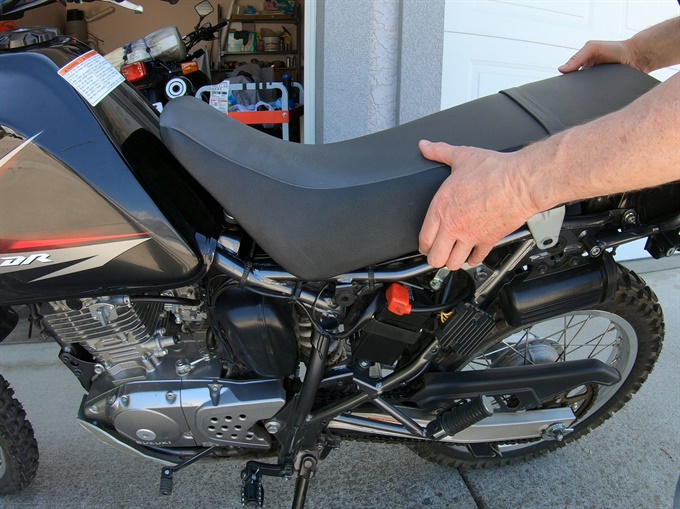
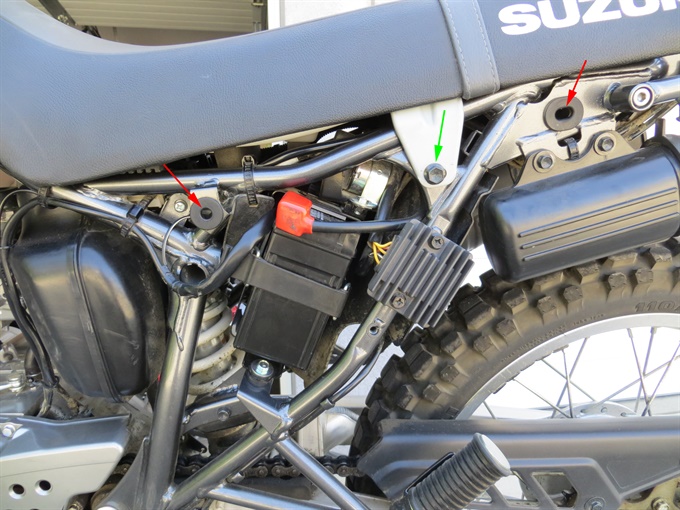
19. Install the seat. There is a lip/tab on the underside of the seat that fits under the fuel tank mounting bracket. Line-up the side mounting brackets of the seat with the bolt holes in the frame. Install and tighten-up each corresponding bolt (12 mm head).
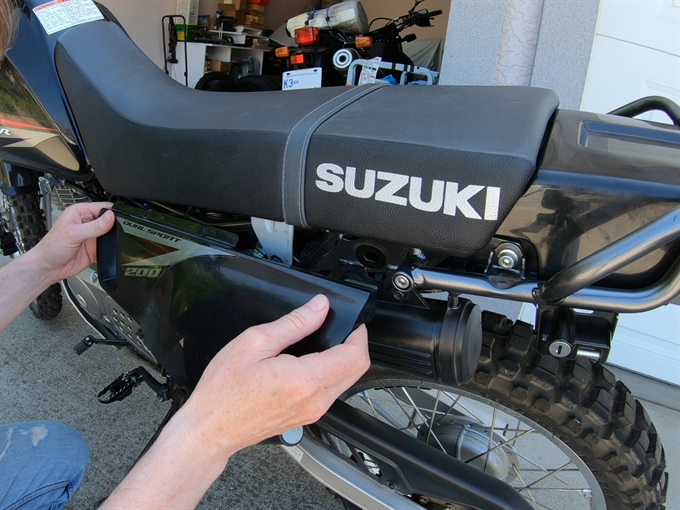
20. Install the side covers. There are a couple of rubber grommets and one bolt (#3 Philips) for each.
All done!
Previous