2012 Honda CBR250R/RA Valve Adjustment Procedure - Page 1
Also applicable to the Honda CRF250L, CRF300L, CRF300L Rally, CBR300R, CB300R, Rebel 300
Article Last Updated: Nov 14, 2023Next
Disclosure: While the author has attempted to provide correct and complete information, sometimes errors or omissions may occur. By using this document and following the procedures and advice below, the user assumes all risk and responsibility for injury or damage to their motorcycle. The author has been servicing motorcycles for many years (not as a profession) and is mostly self-taught (no formal training in motorcycle servicing). It is recommended that you consult the factory owner’s manual and/or service manual for your motorcycle.
Read all of the instructions before beginning. If you have a digital camera, it may be helpful to take some photos of the bike as you remove parts and reposition others so that you can refer to them later as you put the bike back together. The following is based on the author’s observations and experience performing a valve clearance adjustment on the 2012 CBR250RA and on information contained in the official Honda service manual for the 2011 CBR250R/RA (part no. 61KYJ00) which the publisher has stated is also applicable to the 2012 model year.
The service manual skips over a few points that would be helpful to know in advance. This guide attempts to fill in some gaps, help clarify some points and offer some hints to make the valve adjustment procedure a little easier. The actual valve clearance inspection and adjustment procedure is applicable to the Honda CRF250L, CRF300L/LR, CBR300R and CB300R. The specified valve clearances are likely all the same (the CRF300L/LR clearances are), but you should still consult the owner's manual or service manual to verify that as well as other information.
It may be easier to perform the valve adjustment if you remove the fuel tank because the space to get your tools and hands under it is quite tight. I’ve heard, though, that it can be difficult to disconnect the fuel line from the fuel pump; the quick connectors are apparently not so easy to disconnect, but there is probably a tool available to make that easier. There are also a number of wires, cables, tubes, connectors, the frame tubes and other parts that impede access to the valves. Anyway, you can check and adjust the valve clearance without removing the fuel tank; that’s the way I did it, but the access and visibility is somewhat limited.
By performing the valve clearance check and possibly valve clearance adjustments yourself, you can save a significant amount of money, learn more about your bike and gain the satisfaction of maintaining your bike yourself. The most frustrating thing about this procedure on the CBR250R is the limited amount of access or working room. There is nothing technically challenging about the procedure though, especially since the camshafts do not need to be removed in order to replace valve shims. Use the correct tools for the job, and take your time.
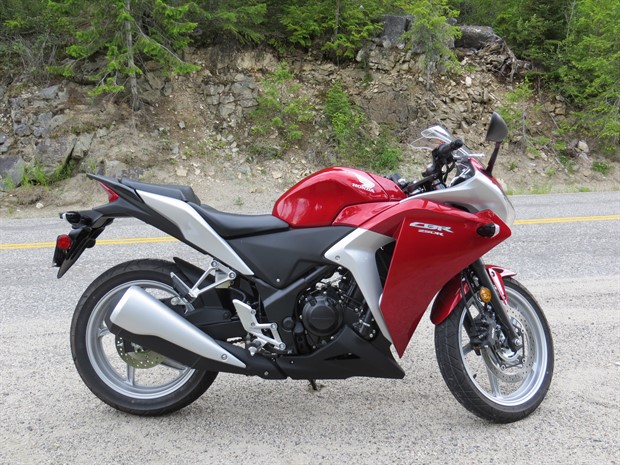
Note: with 1033 km on the CBR250RA in the photos, both exhaust valve clearances (0.19 and 0.20) were less than the specified range and needed adjustment, but the intake valve clearances (both 0.17) were fine.
Parts and supplies you may need:
- valve shims (sizes to be determined after measurement of valve clearances and original shims)
- a new valve cover seal/gasket if the existing one is old, hard or damaged
- copper sealing washers for the bolts securing the rocker arm shafts (you may be able to reuse the existing ones, but the service manual says to use new ones)
- black liquid silicone sealant suitable for engine valve covers (it should say on the product label) available from auto supply stores or a dealer. Honda Service Manual examples: Three bond 5211C or 1207B or 1215 or Shin-Etsu Silicone KE45 or equivalent.
- new valve cover bolt seals if the existing ones are old, hard or cracked
- new O-ring for the timing hole cap (you may be able to reuse the old one)
- new O-ring for the crankshaft hole cap (you may be able to reuse the old one)
- motorcycle engine oil that you currently use for your bike
- shop towels, rags
- electrical tape
- disposable gloves
Tools you may need:
- torque wrench
- tool to remove the crankshaft hole cap and timing hole cap (ex. Motion Pro timing plug wrench); you may be able to improvise with a scrap of metal or coin and vise grips
- telescoping mirror
- telescoping magnet
- 10 mm, 12 mm and 17 mm (?) sockets
- 6-inch extension
- ratchet
- 5 mm and 6 mm hex keys (Allen keys / wrenches)
- feeler gauges, preferably angled and tapered (or narrow) to measure the valve clearances
- micrometer to measure shim thickness
- flat bladed tweezers
- small flat bladed screw driver
- needle nose pliers
CBR250R/RA Valve Clearance Service Interval (2011-2012 factory service manual)
Initial service at: 1000 kmRegular interval: 25,000 km (approx.)
CBR250R/RA Valve Clearances (2011-2012 factory service manual)
Engine cold: below 35C (95F)Intake: 0.16 +/- 0.03 mm (0.006 +/- 0.001 in)
Exhaust: 0.27 +/- 0.03 mm (0.011 +/- 0.001 in)
CRF300L Valve Clearance Service Interval (2021-2022 Honda CRF300L/LA/LR/LRA factory service manual)
Initial service at: 25,600 kmRegular interval: 25,600 km
Honda CRF300L/LA/LR/LRA Valve Clearances (2021-2022 Honda CRF300L/LA/LR/LRA factory service manual)
The valve clearances are the same as those for the CBR250R above.Engine cold: below 35C (95F)
Intake: 0.16 +/- 0.03 mm (0.006 +/- 0.001 in)
Exhaust: 0.27 +/- 0.03 mm (0.011 +/- 0.001 in)
Next