2012 Honda CBR250R/RA Valve Adjustment Procedure - Page 2
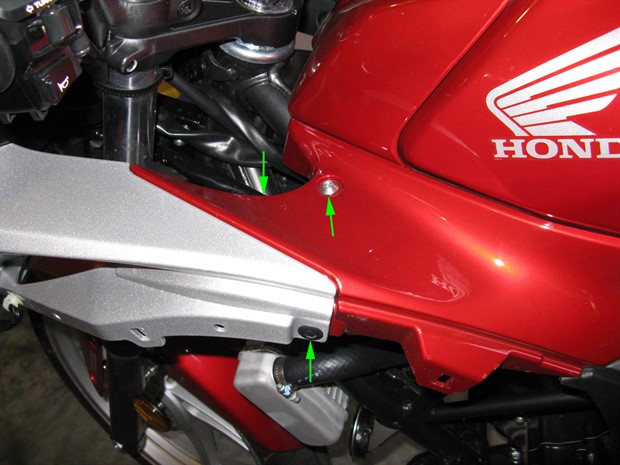
Prev | Next1. Remove middle fairing panels (3 bolts, 3 snap clips, 1 pair of wires for each)
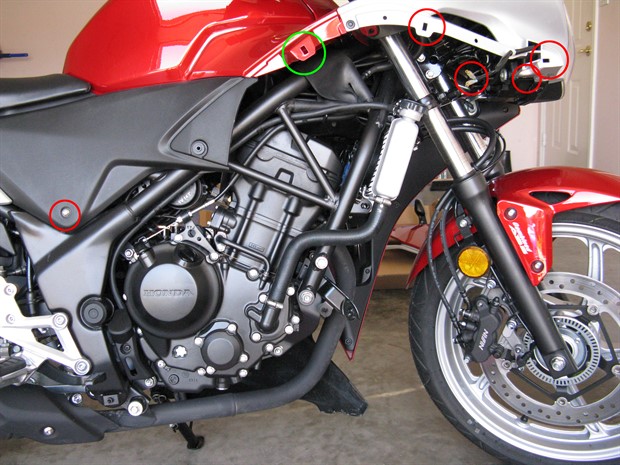
- Remove the 3 bolts securing the panel.
- The white plastic clips are along the top edge of the panel. See image below to see location of the clips, a bolt securing the side cover and the turn signal wire connectors. If you look behind the fairing, you can see the clips. Grasp the fairing panel near the rear most clip and pull firmly, but carefully, then do the middle one and finally the clip in front of the turn signal. Don’t twist or tilt the panel or allow one end to drop otherwise the clips or the fairing panel may be damaged.
- Use needle nose pliers to disconnect the turn signal wires – grasp the connector ends, don’t pull on the wires.
- You do not need to remove the black plastic under cowl to check the valve clearances.
2. Remove the fuel tank side covers (1 bolt, 2 trim clips for each). Remove the bolt and then remove the clips by pushing in the centre pin and then pulling out the entire clip. See images below. To reset the clip, push the centre pin outwards so that it is protruding beyond the outer casing. To reinstall, push the clip into the holes of the fairing, and then push in the centre pin until it is flush with the outer casing.

3. Remove the fuel tank cover (secured by rubber grommets in tank).
4. Remove the passenger and rider seats.
5. I prefer to disconnect the battery at this point (disconnect the negative wire).
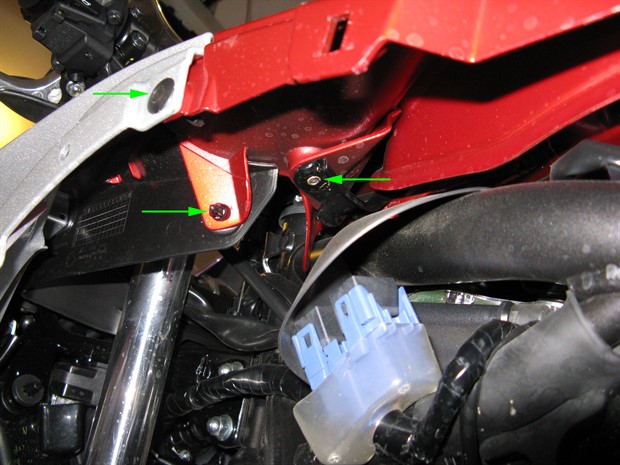
6. Remove the exposed bolt (one each side) securing the black side covers (see photo for step 2).
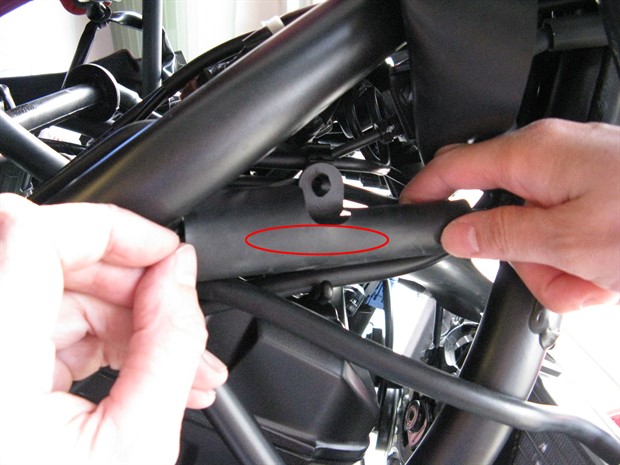
7. Pull the side cover tabs out of the rubber grommets in the lower edge of the fuel tank.
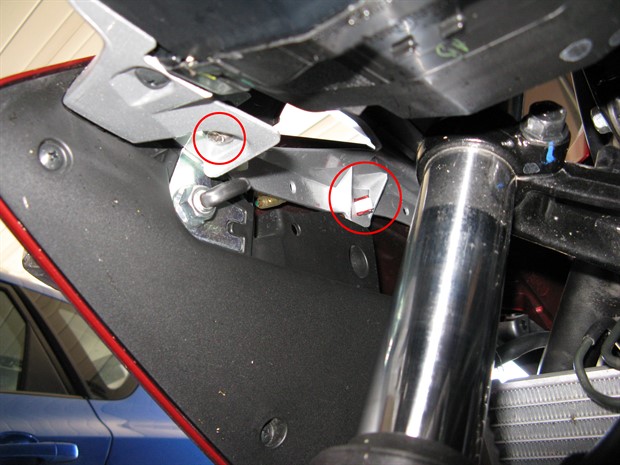
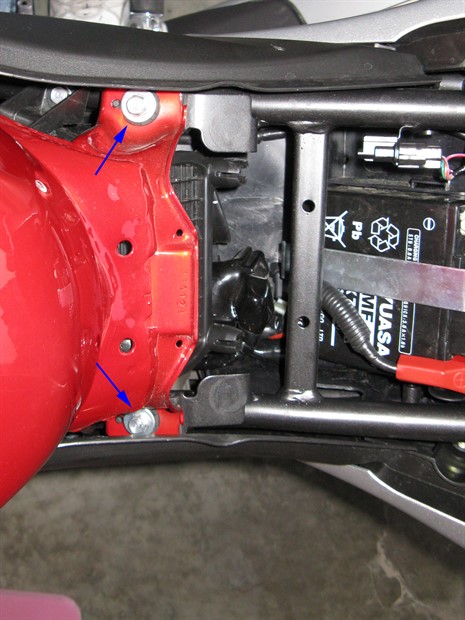
8. Loosen the bolts securing the rear of the fuel tank (back out a fair amount, but you don’t need to completely remove them - see image below).
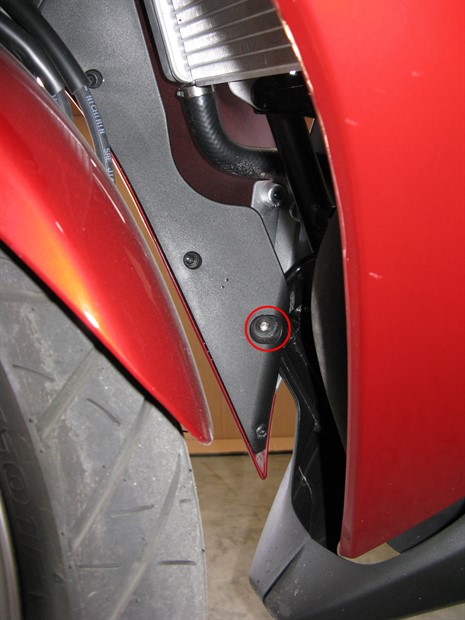
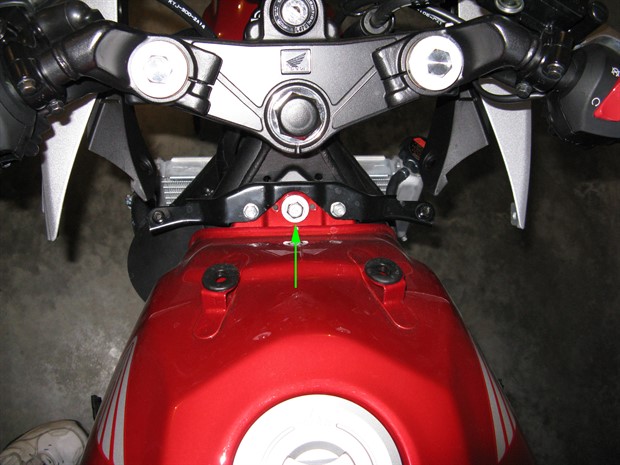
9. Remove the forward fuel tank mounting bolt (see image below).
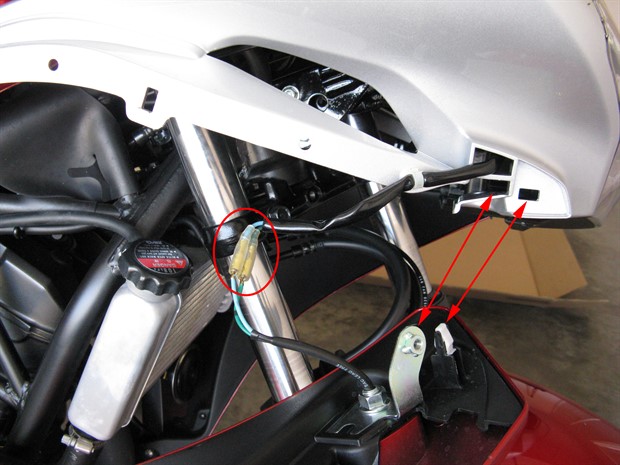
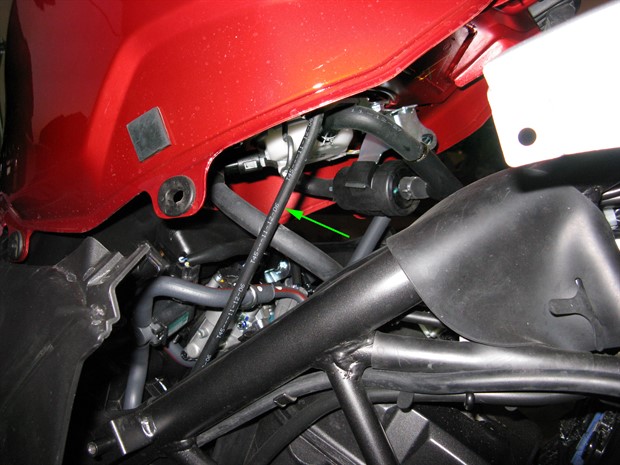
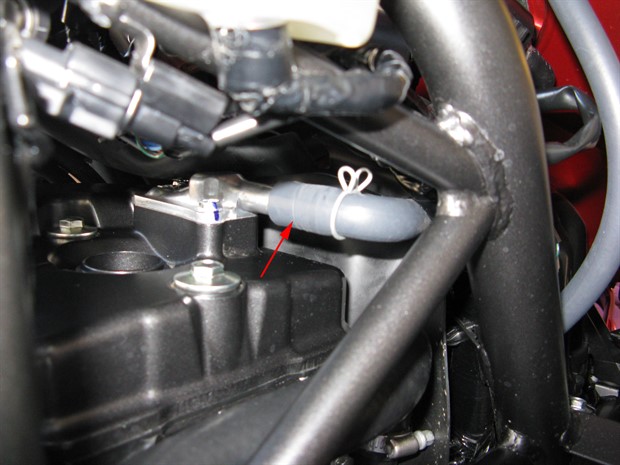
10. Prop up the front of fuel tank a bit with a suitable support (I used a pair of old rubber foot pegs) and disconnect the fuel tank vent hose (the skinny tube on right side - see image below). Pull up the fuel tank drain hose to gain more slack.
11. Release the black plastic fuel pump wiring harness clamp (see image below) from the metal setting plate attached to the tank so you can lift the fuel tank a bit higher; just squeeze the end of the clamp that is inserted into the metal plate and push it through the plate. You should not need to actually disconnect the fuel pump electrical (white 5 pin) connector unless you intend to completely remove the fuel tank. If you do intend to remove the fuel tank completely in order to gain better access to the valves, you will also need to disconnect the fuel line.

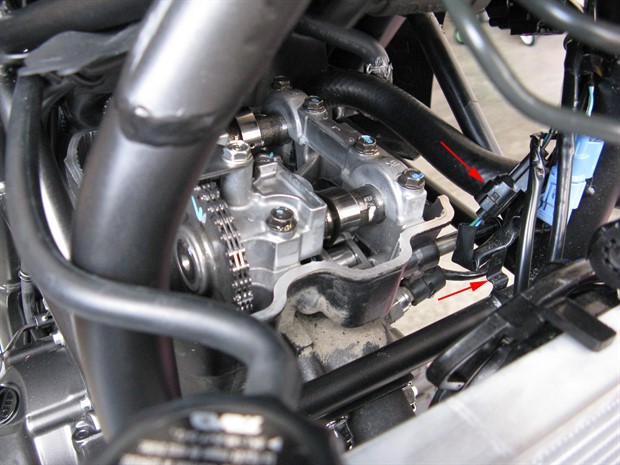
12. Unclip the electrical connector for the fan from the tab on the frame so you can gain some extra slack (see image below which also shows the valve cover removed - later step). You don’t need to actually disconnect the connector.
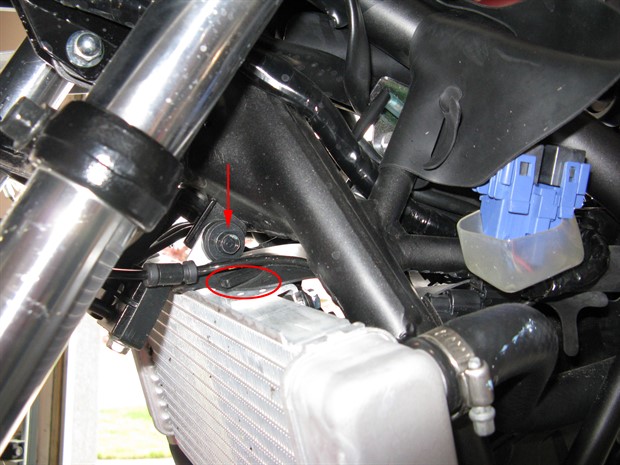
13. Remove the bolt and unhook the rubber sheet securing the radiator (see image below). Slide the radiator out of the mounts to the left and lower it. Be careful not to damage the radiator cooling fins – they’re easily bent, but they can be straightened out with a small flat screw driver.
14. Disconnect the tabs of the top rubber sheet under the tank and roll up the sheet to the steering head and tape it in place.
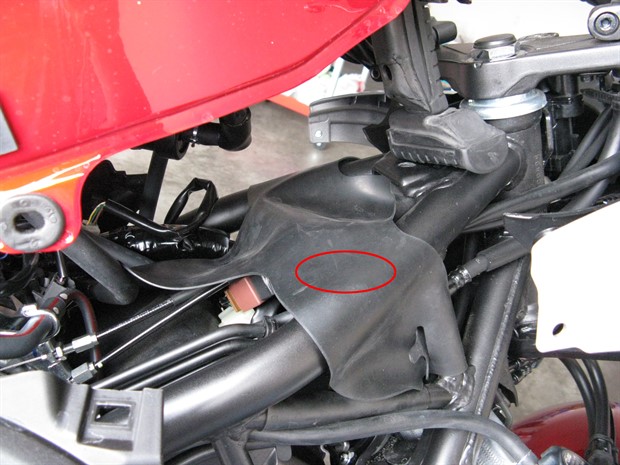
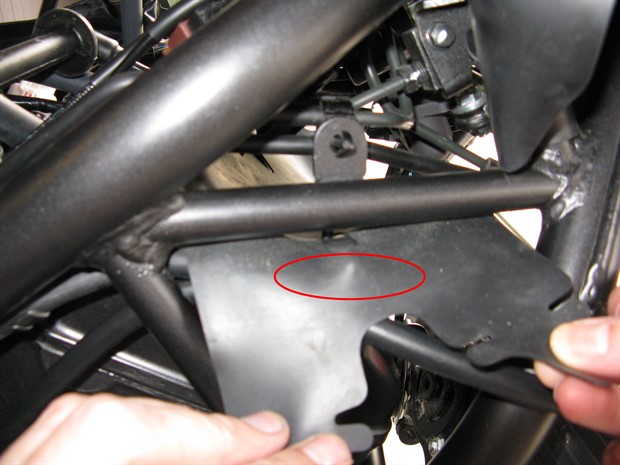
15. Disconnect the tabs of the lower rubber sheet (see images below).
16. Disconnect the spark plug wire (pull on cap, not the wire) and pull it through the lower rubber sheet and move it out of the way. Push the rubber sheet to the back as much as you can. You do not need to remove the spark plug itself.
17. Clean off the valve cover and anything that’s dirty above it.
18. Disconnect the hose from the PAIR valve on the valve cover (see image below which shows the hose partly removed). The service manual states to remove the actual PAIR valve, but you don’t need to.
Prev | Next