2020 Kawasaki KLX140 Chain Adjustment - Page 2
Previous
Road and Trail guide
If the chain is extremely dirty, I recommend that you clean it first. The original chain on our KLX140L is a non O-ring chain. If your bike has an O-ring chain, I recommend that you use kerosene to clean it; for a non O-ring chain, you may have more options, but kerosene works well. The chain also needs to be lubricated prior to chain slack measurement.
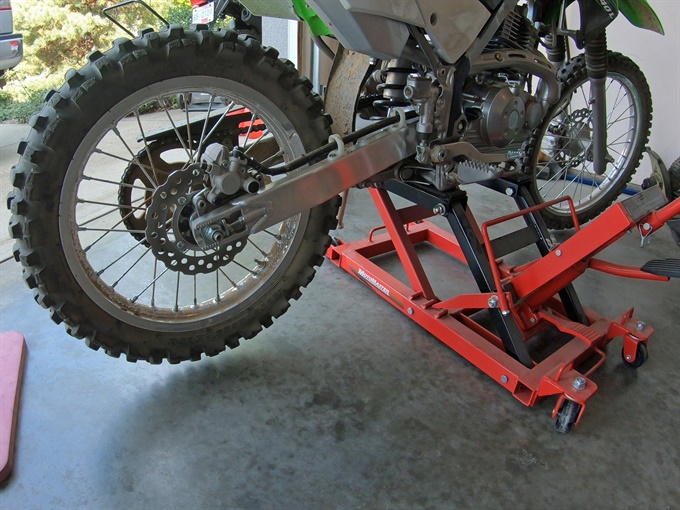
The method to measure chain slack may vary by motorcycle. To accurately determine the chain slack on a KLX140, the rear wheel should be raised off the ground, or at the very least, the rear suspension should be unloaded so that it is fully extended. Finding the tightest point of the chain for proper chain slack measurement will be easier if you can jack the motorcycle up (or place it on a work stand) so that the rear wheel is off the ground so you can rotate it.
If you don't have a motorcycle stand or jack, you can lean the motorcycle over to the left while on the side stand, and place a section of 2x4 (or an axle stand, trail stand or scissor jack) under the frame near the right foot peg to prop the bike to get the rear wheel off the ground. Get someone to help you. Alternatively, you can measure the chain slack in multiple locations by pushing the motorcycle a bit between measurements and leaning the motorcycle over enough while it's on the side stand so that the rear suspension is fully extended. Again, try to get someone to assist you.
1. Gather your tools and supplies.
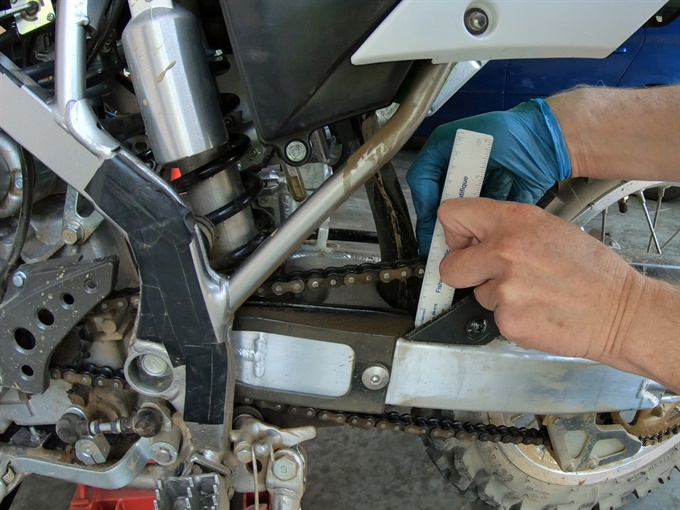
2. Lubricate the chain especially if it looks a little dry or if you can see some kinks in it, otherwise you may not get accurate chain slack measurements.
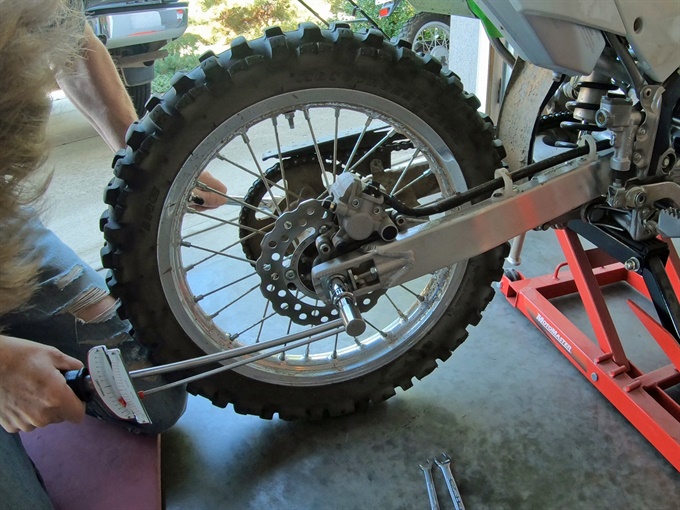
3. Measure the slack in the chain in multiple locations to determine the tightest point (least amount of slack) in the chain. Measure from the top of the swingarm at the end of the chain slipper to the underside of the chain above (the rounded part below a chain link pin). If the chain slack at the tightest point is within the specified range, you're done; otherwise, continue with the following steps.
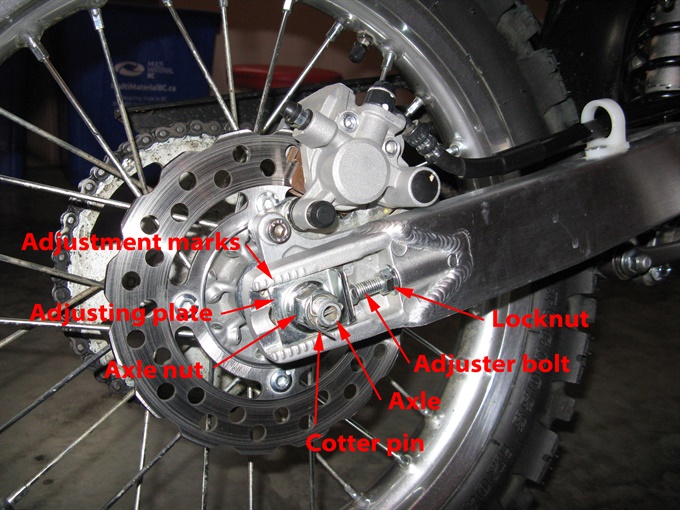
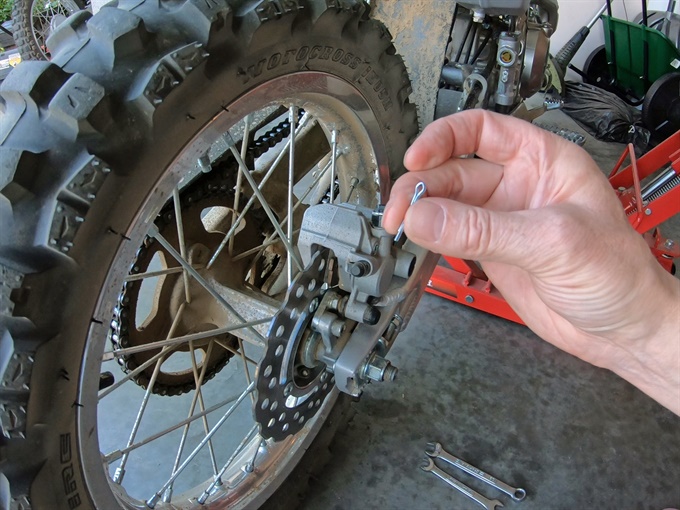
4. Use needle nose pliers to remove the cotter pin from the end of the axle. You may be able to loosen the axle nut without removing the cotter pin. It depends on the tool you're using to loosen the axle nut and the size and orientation of the cotter pin. You may find that the cotter pin gets in the way, and it may be easier to just remove it, which is usually not difficult. Do whatever you find easiest or most convenient. There should be enough thread on the axle between the axle nut and the cotter pin to loosen the axle nut enough to facilitate chain adjustment without removing the cotter pin. FYI, the service manual states to remove the cotter pin.

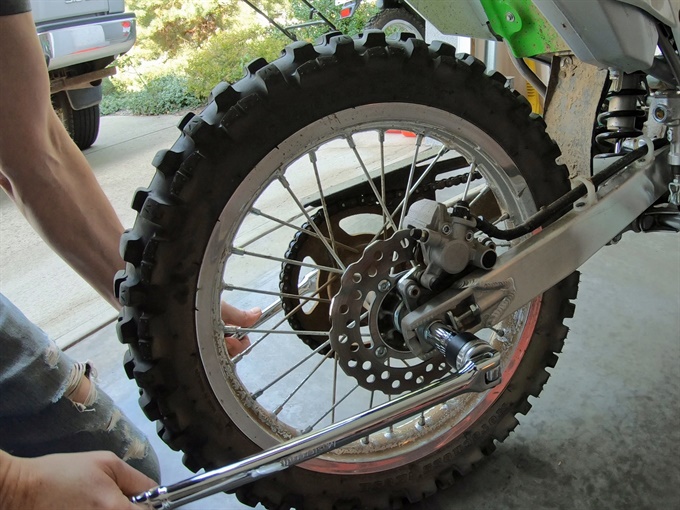
5. Loosen the rear axle nut a bit which may be easier while the full weight of the motorcycle is on the wheels and side stand because the motorcycle is generally more stable than when it is jacked up (but it depends). Hold the left side of the axle with a 17 mm wrench or socket and ratchet so it does not turn. Use a 19 mm socket and a breaker-bar or long-handled ratchet to loosen the axle nut.
6. Raise the rear wheel off the ground, if possible. See note above for options.
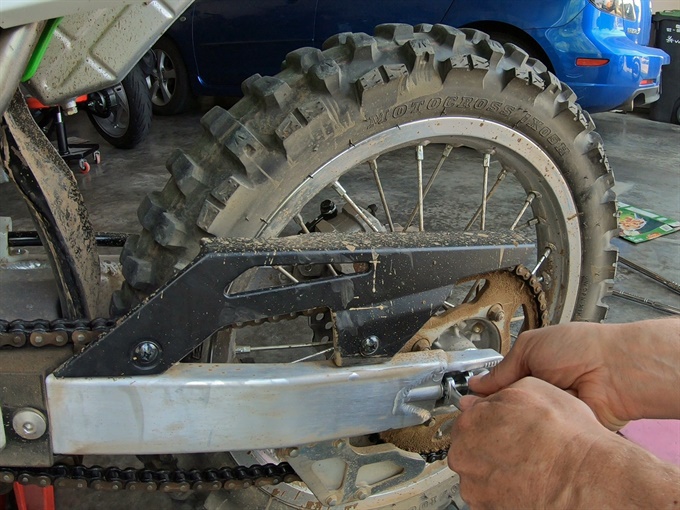
7. Loosen each chain adjuster locknut (one on each side) with a 12 mmm wrench while holding the adjuster bolt with a 10 mm wrench to prevent it from turning.
8. Further loosen the rear axle nut just enough (a couple of turns or so) so that the rear wheel can be moved by hand.
9. Push the wheel forward so that the chain adjuster plates are up against the adjusting bolts.
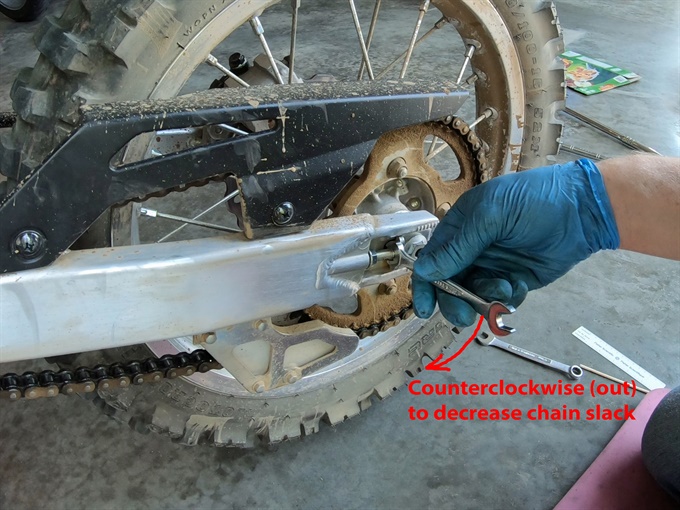
10. Starting on the chain side, turn each adjuster bolt out (to reduce slack) an equal amount. A 1/4 turn out reduces the chain slack by about 2 mm or so. To increase chain slack, turn the adjuster bolts in and push the wheel forward.
11. Measure the chain slack (at tightest point). Repeat previous step if the chain slack is not within specification.
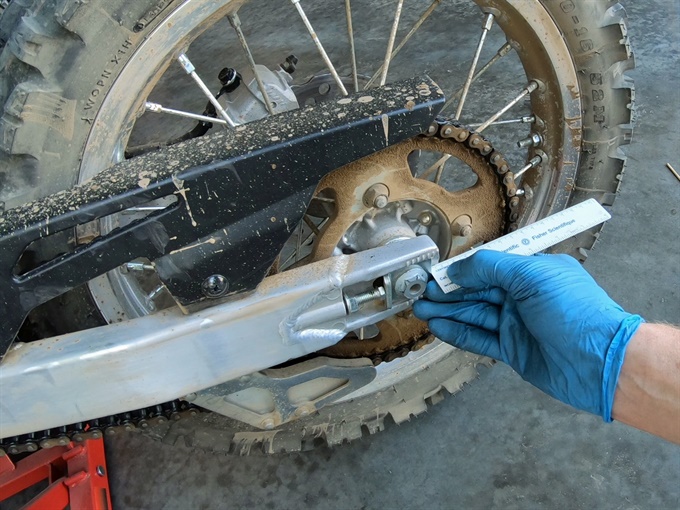
12. Verify that the rear wheel is in proper alignment. Check the position of the rear edge of each adjuster plate relative to the chain adjuster marks or the end of the swingarm. The measurements/positions need to be the same. If the measurements/positions differ, adjust the non-chain side adjuster so that they are equal. Measure the chain slack. If the chain slack is not within specification, go back to step 9.
13. Tighten up each adjuster bolt locknut securely (but not super-tight!) while preventing the adjuster bolt from turning.
14. Tighten up the axle nut, but not completely, while holding the other end to prevent the axle from turning.
15. Measure the chain slack. If the chain slack is not within specification, loosen up the axle nut and adjuster bolt locknuts and go back to step 9.
16. Torque up the axle nut to specification: 79 N.m / 58 ft.lb. Be careful if the motorcycle is still jacked up or supported because it might not be as stable as it would be with full weight on the wheels.
17. Measure the chain slack again. If the chain slack is not within specification, loosen up the axle nut and adjuster bolt locknuts and go back to step 9.
18. Install a new cotter pin in the axle end (if the cotter pin was removed). Bend the ends of the cotter pin around the axle. If you don't have a new cotter pin, use the old one as a temporary measure.
19. Lower the motorcycle or remove the support(s).

All done!
Previous