2023 Honda CRF300L Air Filter Replacement and Battery Access - Page 3
Previous
Road and Trail guide for removing and installing the battery
1. Remove the key from the ignition.
2. Remove the seat. See previous instructions.
3. Remove the left side cover. See previous instructions for right side cover.

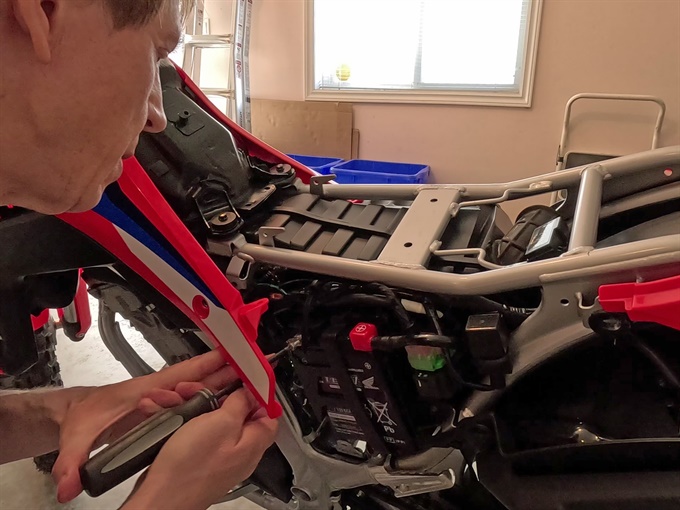
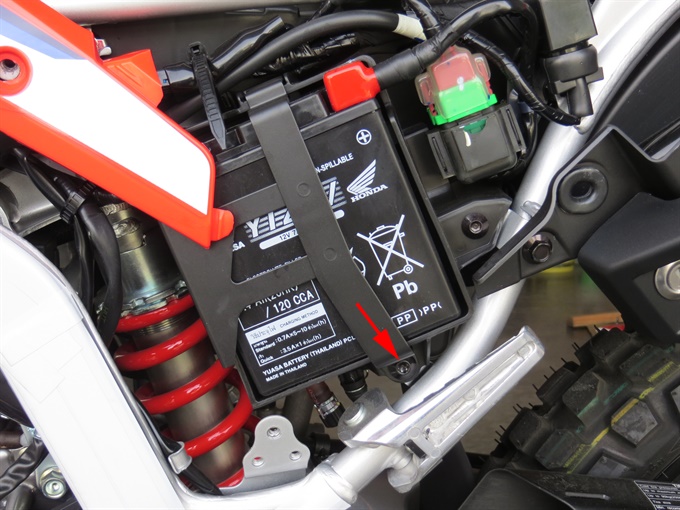
4. Left tank shroud. The manuals state to remove the left tank shroud. You can remove the battery without removing the left tank shroud by removing the rear bolt and then flexing the tank shroud outwards just enough to pivot the battery holder up so that the battery can be pulled out. There may be a small risk of cracking the tank shroud if the air temperature is low. If you only want to access the negative battery terminal, you only need to bend the tank shroud out a bit. To remove the battery will require you to bend out the tank shroud more.
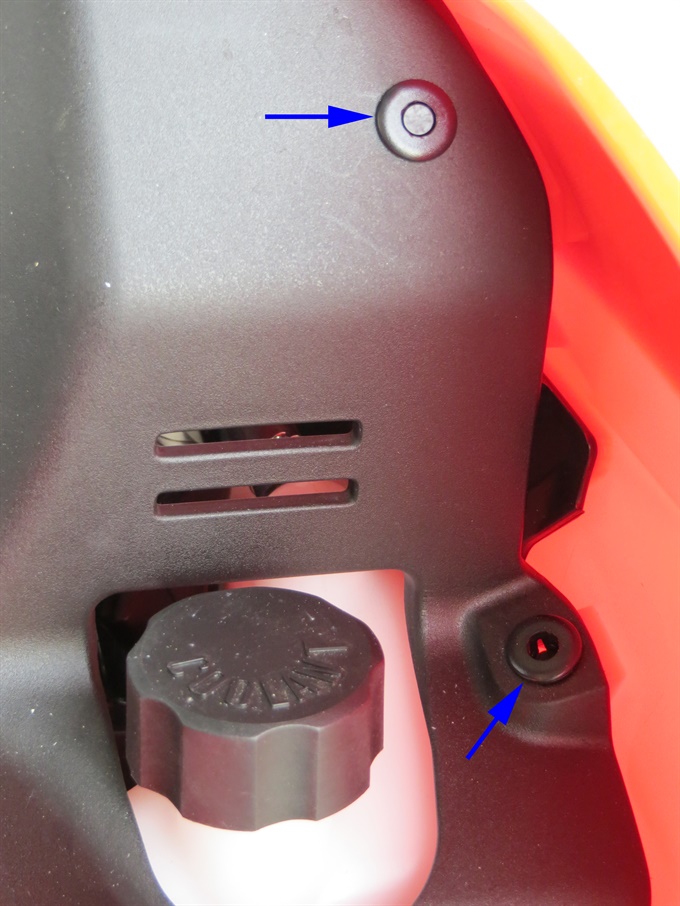
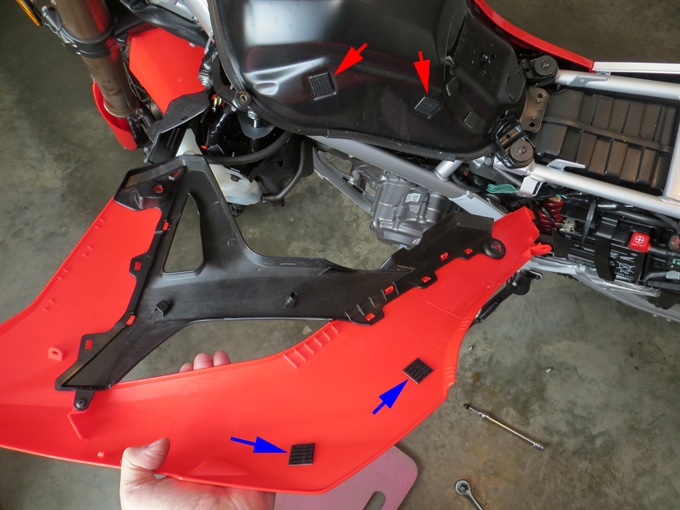
The left tank shroud is held in place by three 5 mm Allen (hex) bolts, two push rivets (connecting the shroud to the coolant cover) in addition to the one connecting the shroud to the side cover, and two dual-lock fasteners near the top edge of the shroud, between the shroud and the fuel tank. A dual-lock fastener is sort-of like Velcro, except with two plastic halves. I've dealt with dual-lock fasteners before; they can be difficult to separate, and it is possible for the adhesive to let go, so use caution. I don't think Honda's use of dual-lock fasteners were absolutely necessary in this case; they seem a bit overkill to me. I found the particular dual-lock fasteners used here were not difficult to separate, so you probably don't need to be too concerned.
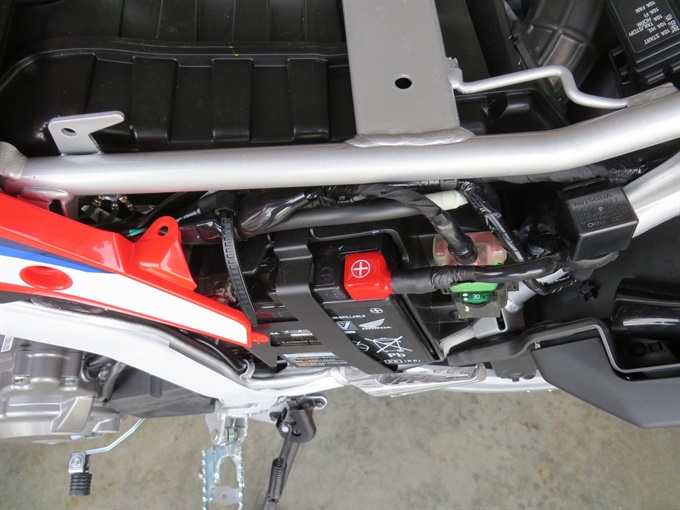
5. Disconnect the negative wire from the negative battery terminal. Use a #2 Philips screw driver or an 8 mm socket and ratchet or nut driver. Tuck the negative wire away so that it won't make contact with the battery terminal. Always disconnect the negative wire/terminal first.
6. Disconnect the positive wire from the positive battery terminal.
7. Remove the bolt (5 mm hex) for the battery holder and then remove the battery holder or just pivot it upwards. If you have not removed the left tank shroud, you will need to bend out the tank shroud to make clearance (be careful). Remove the rear tank shroud bolt first.
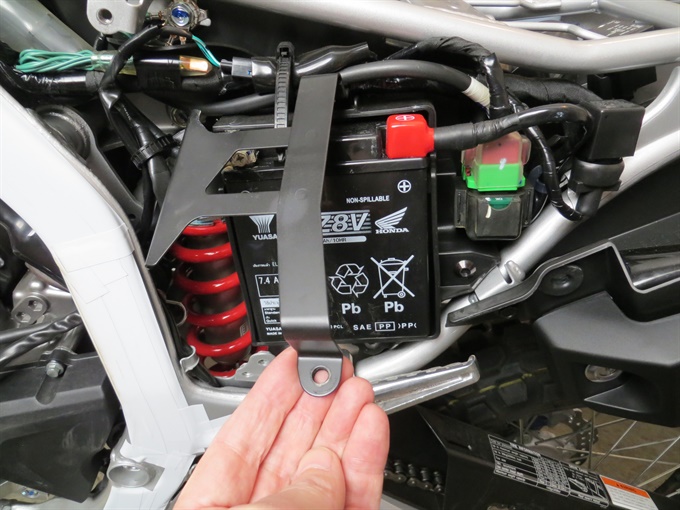
8. Pull out the battery.
9. To install the battery, reverse the above steps. Always connect the positive battery terminal first. To more easily align the left tank shroud with the mounting holes, take a piece of thin cardboard and bend it over in half and slip it over the top edge of the tank shroud so that it covers the portion of dual-lock fasteners stuck to it. Use a small piece of electrical tape on the side facing outwards to hold it in place. Now align the bolt holes in the tank shroud with the corresponding mounting holes of the frame or frame tabs. Insert all three bolts and screw them all in a bit, and then tighten them (not excessively). Insert the two push rivets and set them. When you're satisfied with everything, pull out the cardboard. If you don't think the dual-lock fasteners are necessary, and you want to be able to remove the tank shroud easier (if you had trouble), you could tape a small piece of thin plastic (like from a milk jug) over the half of the dual-lock fasteners attached to the tank shroud; this may cause the tank shroud to be pushed out a tiny bit.
10. Check the clock and adjust the time if necessary.
Previous