2023 Honda CRF300L Air Filter Replacement and Battery Access - Page 2
Previous
Next: Battery
Road and Trail guide for servicing the air filter
Torque SpecificationsSeat hook bolts: 21 N.m (15 lbf.ft)
Air cleaner cover screws: 1.2 N.m (0.9 lbf.ft)
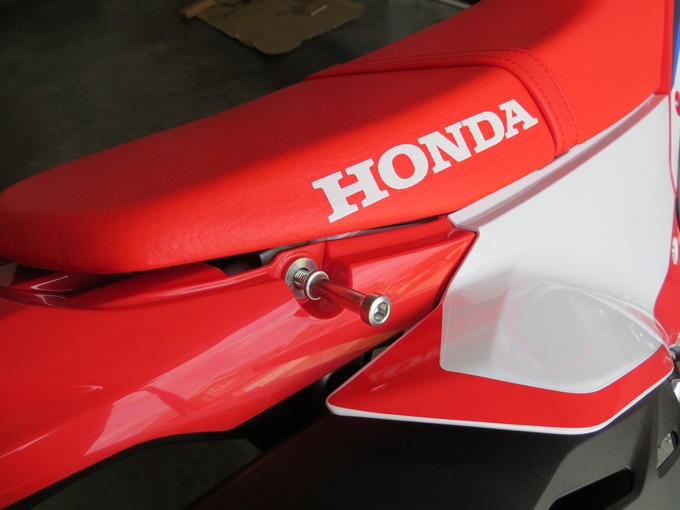
1. Remove the seat. There are two 6 mm Allen bolts near the rear of the seat, one on each side, that need to be removed. After removing the seat bolts, pull the seat to rear while lifting at the rear slightly and pushing down lightly at the front edge initially. Lift off and set aside.
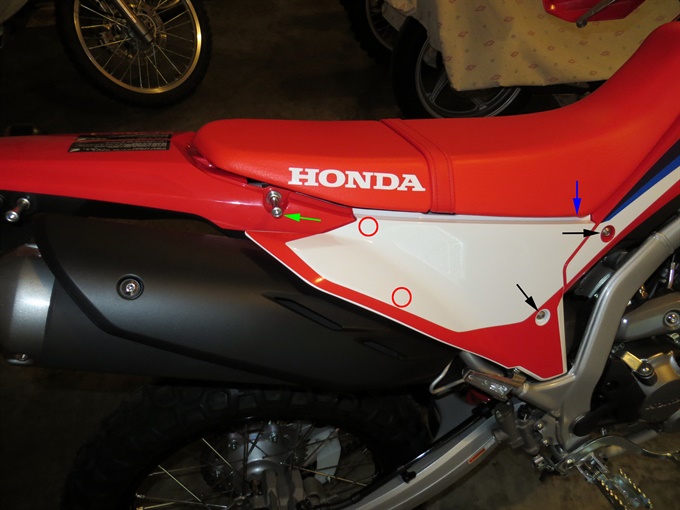
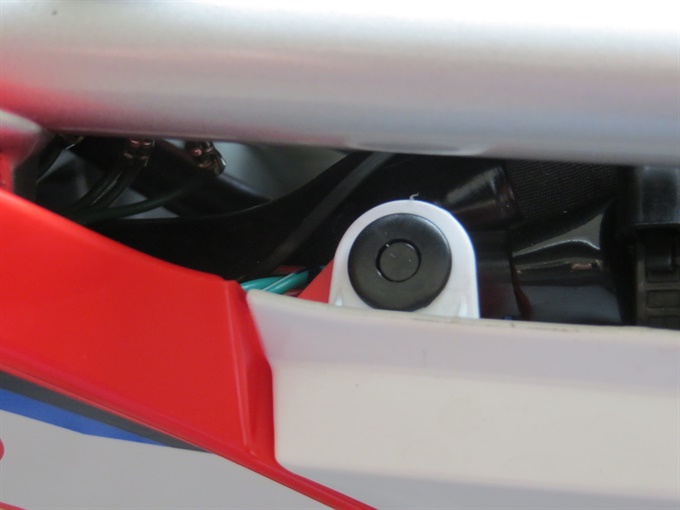
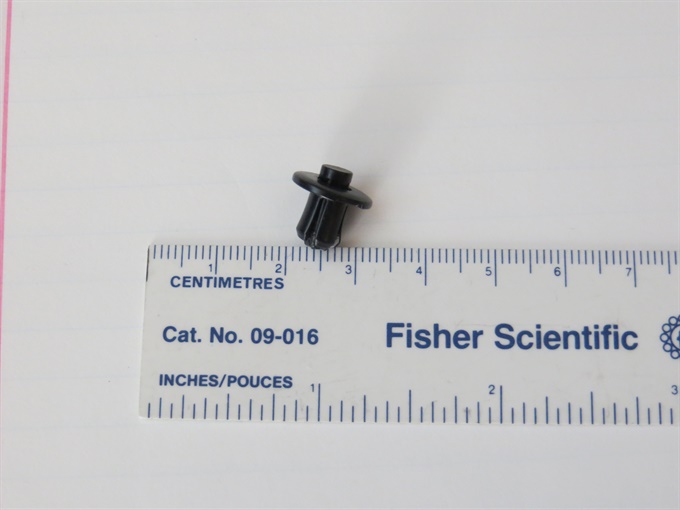
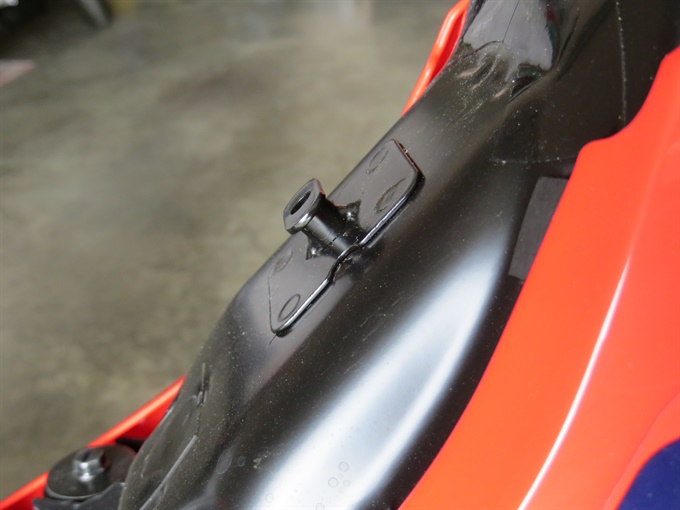
2. Remove the right side cover. There is a push rivet, a single 5 mm Allen (hex) bolt and two grommets holding the side cover in place. There is also a tab on the right tank shroud and a lip on the leading (front) edge of the side cover. Push in the center pin of the plastic push rivet at the top of the side cover near the front. The pin needs to be pushed-in about 3 mm. You should hear a click. Remove the 5 mm Allen (hex) bolt securing the right side cover. It may be helpful to also remove the rear right tank shroud bolt (5 mm). The grommets are located near the top edge in the rear and near the mid-point of the lower edge of the side cover. Pull the side cover outwards from the top rear portion and then the centre portion of the side cover. "Unhook" the side cover from the tank shroud and set aside; the side cover and the tank shroud overlap a bit and there is a small tab on the tank shroud.
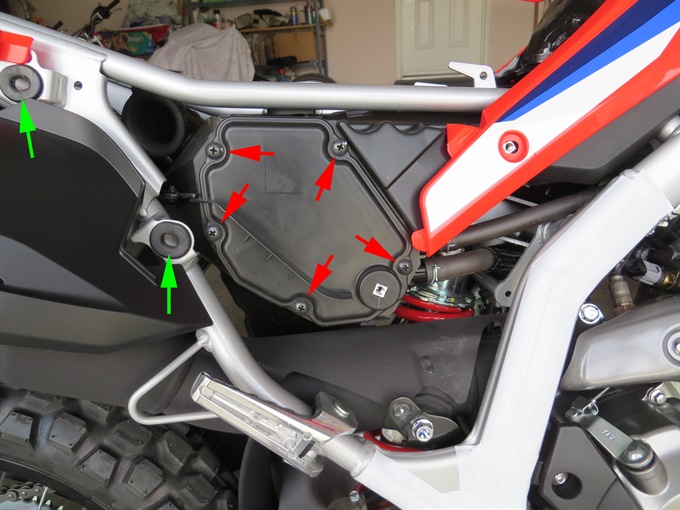
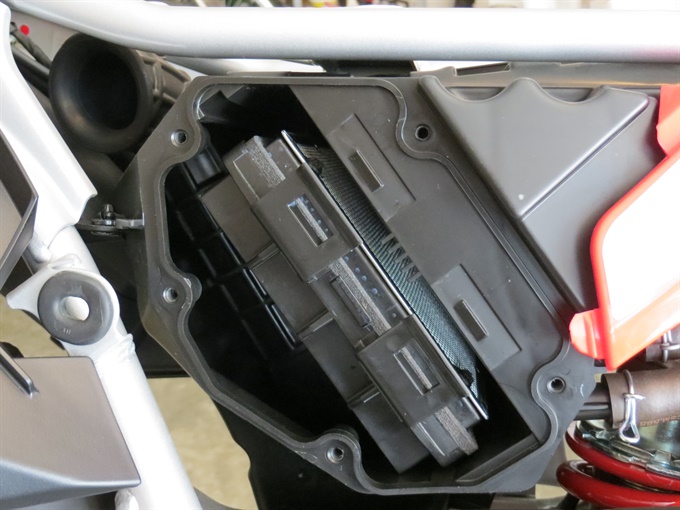
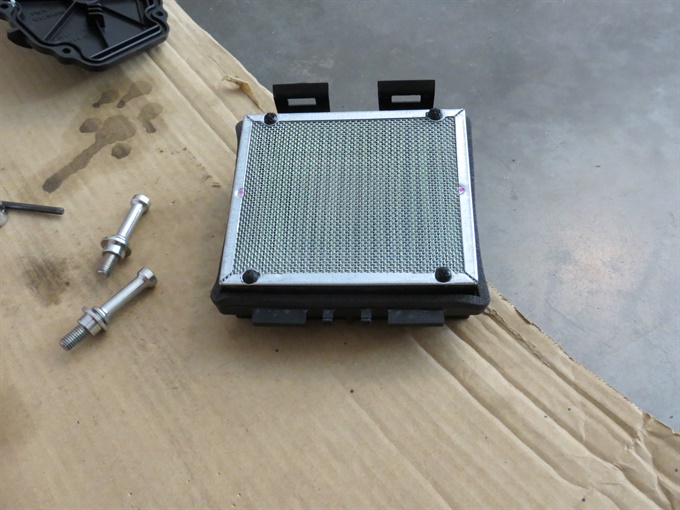
3. Remove the air box side cover. There are five Philips screws (#2) securing the air box side cover. Remove all 5 screws and then remove the cover. The air filter will be visible.
4. Inspect the air filter. If it is especially dirty, it should be replaced.
5. If removing the air filter, wipe out as much dirt from the air box as you can prior to removing the filter. Also clean the inside of the air box cover including the groove/seal just inside the perimeter.
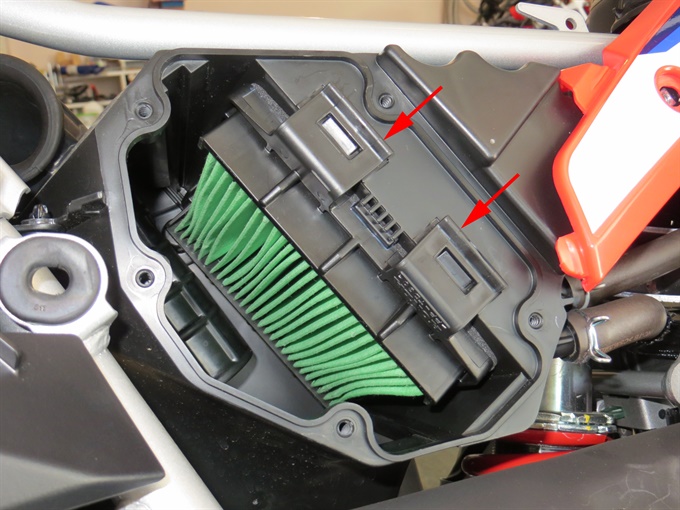
6. To remove the air filter, release the two tabs/clips on the outside edge of the air filter and pull the air filter out.
7. Carefully wipe the air filter sealing edge of the air box.
8. Inspect the foam gasket of the new air filter to make sure that it is in place and intact.
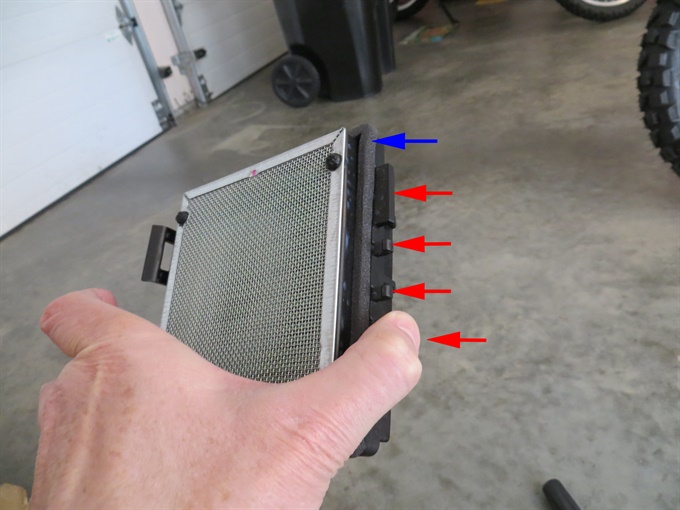
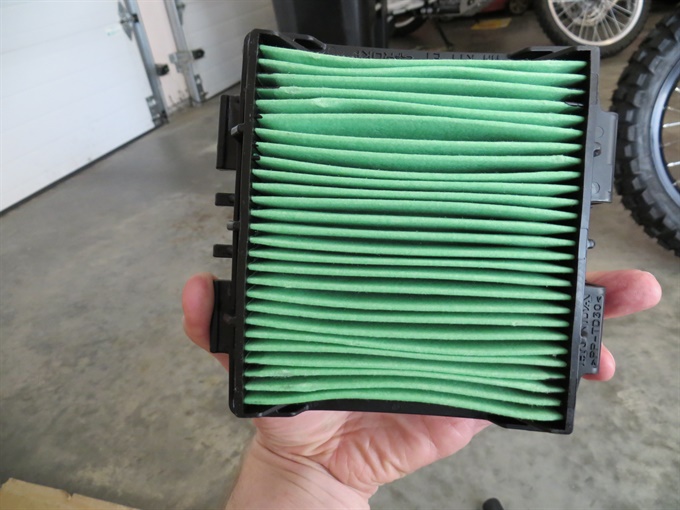
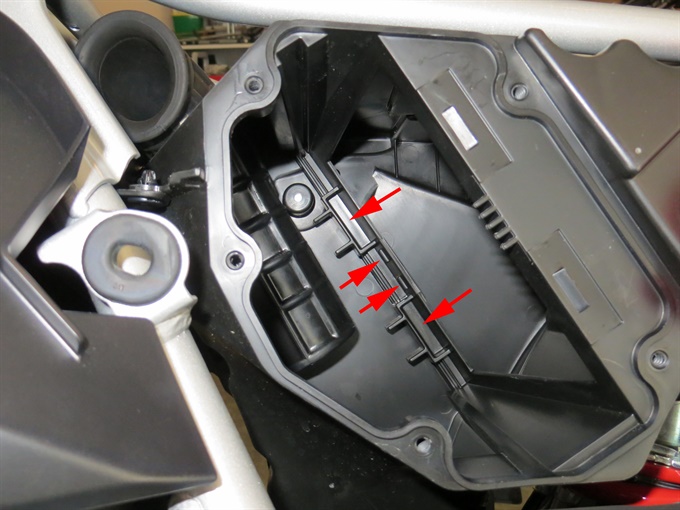
9. Install air filter by inserting the protruding tabs on the back (inside) edge of the air filter into the corresponding rectangular shaped regions in the back of the air box. Push the air filter straight in. You should feel it sort-of click into place. Push the outer edge of the air filter towards the front of the bike to engage the outer clips of the air filter with the air box. Ensure that the filter is sealing correctly with the air box. Use a flash light if necessary to see inside the air box. The metal screen of the air filter faces towards the engine; the paper part faces to the back of the bike.
10. Install the air box cover. Lightly tighten the five screws securing the air box cover.
11. Install the right side cover. Connect the side cover to the tank shroud (over-lapping edges and a tab), line-up the side cover boss (stud/protrusion, inner side of side cover) with the rear grommet, the plastic tabs of the side cover and the tank shroud at the front near the fuel tank (side cover tab on top of the tank shroud tab) and the middle side cover boss/stud with the other grommet. Press the side cover into place. If you're having difficulty pushing the side cover bosses/studs into the rubber grommets, you can apply a bit of silicone spray or grease to the grommets first.
Reset the push rivet by pushing the end until the pin portion protrudes a few mm above the larger seating surface portion. Insert the push rivet into aligned holes of the side cover and tank shroud near the fuel tank, just on the inside of the frame. Push the center pin of the push rivet until it is flush with the larger portion. There should be a click.
12. Install the bolt for the side cover (and the rear bolt for the tank shroud if removed) by hand. Tighten the bolt(s), but not excessively.
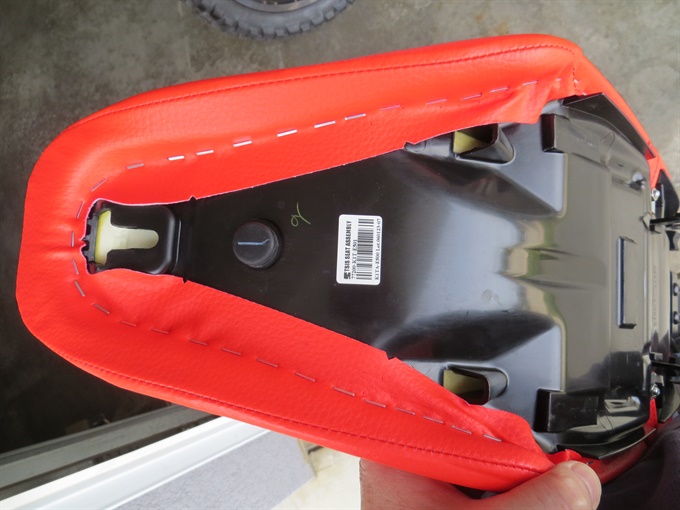
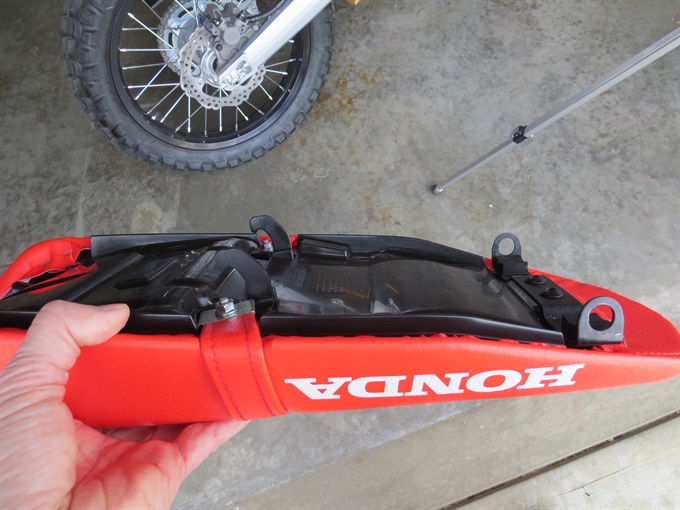
13. Install the seat. The front of the seat slips over a protrusion on the fuel tank. There are two hooks welded to the frame that slip into corresponding "holes" on the seat base near the front of the seat. There are also two hooks on the seat base that hook under metal brackets welded to the frame. At the rear of the seat there are two brackets that line-up with the holes for the seat bolts; the brackets fit between the fender plastic and the frame. Insert the seat bolts with the spacers/collars (larger diameter portion to the outside). The spacers fit inside the holes of the seat brackets. Hand tighten the seat bolts while ensuring that the spacers line-up correctly. Tighten the seat bolts (the specified torque is 21 N.m).

Next: Battery
Previous