Introduction to Motorcycle Maintenance - Page 5
Page Last updated: Sept 9, 2025
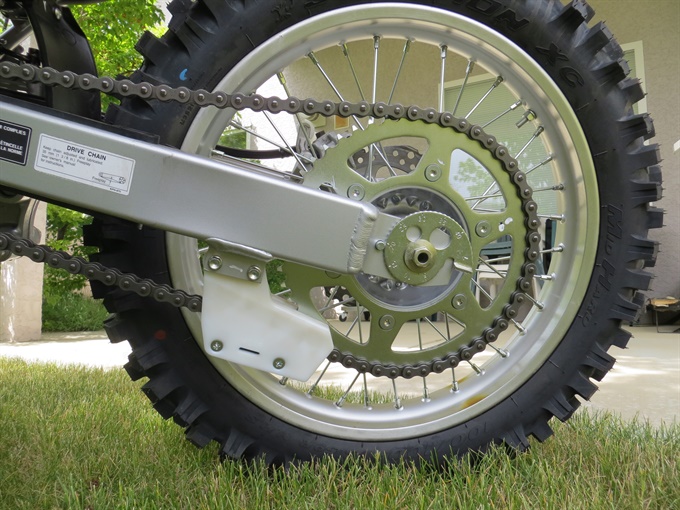
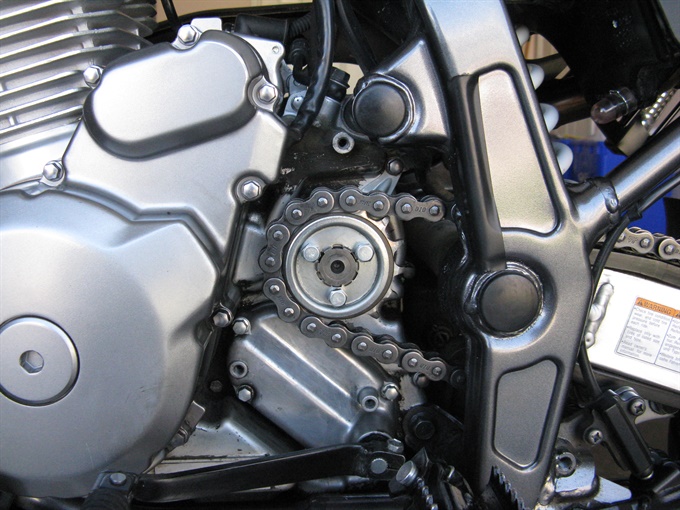
Drive Chain
2020 Kawasaki KLX140 Chain Adjustment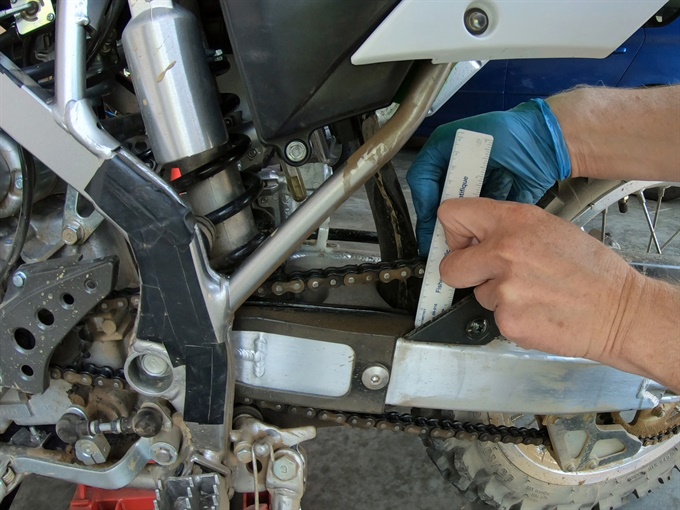
Clean the chain if it is excessively dirty. Lubricate the chain if it appears dry or kinked and after cleaning it. Check chain slack (vertical free movement) after lubricating the chain, and adjust if necessary. Drive chains may wear unevenly, so you need to check the slack in multiple locations. If the chain is excessively worn (no adjustment room left or beyond the service limit, as specified by the manufacturer), severely rusted, severely kinked (not resolved with lubrication), or otherwise damaged, the chain will likely need to be replaced.
Chain slack is typically measured as the vertical movement in the lower chain run, midpoint between the front and rear sprockets, but check the owner's manual for the proper measuring method for your bike. Adjust the slack where the slack is the least (tightest). It is better to have a bit more slack (but not too much) than too little: a very loose chain may come off the sprockets and cause damage to the engine cases and frame and cause the rear wheel to lockup, potentially causing a crash. A chain that is too tight will put excessive strain on the drive train components, can cause accelerated chain and sprocket wear, and limit rear suspension movement. As the suspension compresses and extends, the chain slack varies. Again, consult your owner’s manual or service manual for how to measure chain slack on your motorcycle and for the allowable range. On some motorcycles chain slack is measured with the rear wheel off the ground, while on others the slack is measured with the motorcycle on the side stand.
There are a number or commercial chain lubes on the market, and I’ve tried a number of them. I prefer to use gear oil to lubricate the chains on our motorcycles. Some of the factory service manuals that I have specify to use gear oil to lubricate the O-ring drive chain. I admit that gear oil can make a mess, but it is not difficult to clean. Automatic chain oilers use gear oil or something similar. Gear oil is not sticky like some of the commercial chain lubes, so it does fling off some, but when it does, it takes some of the grit away with it. An O-ring chain uses O-rings between the side plates to seal grease inside to lubricate the chain internally, but the chain rollers (the parts of the chain that make contact with the sprocket) still need added lubricant. External lubrication (oil or chain lube) also prevents rusting of the chain. The O-rings also benefit from external lubrication.
I have used kerosene to clean my motorcycle chains for many years, and the chains have required very infrequent adjustment and have lasted a long time. Some of the factory service manuals that I have state to use kerosene to clean the O-ring drive chain. I was looking at the owner's manual for the 2024 Suzuki SV650 and it stated not to use kerosene, so I then went to the websites for DID and RK Chain; they also state not to use kerosene to clean O-ring chains; RK states to use a rag doused with mineral-based O-ring safe chain cleaner, preferably motorcycle specific, to wipe the chain. DID states to wipe the chain with a cloth dampened with an O-ring/X-ring safe cleaner. They also state not to use a wire brush or a hard bristle brush.
The Honda Common Service Manual (2022) states to clean O-ring chains with non-flammable or high flash-point solvent and wipe it dry, and to ensure that it is completely dry before lubricating it. The manual does not mention kerosene specifically (to use it or to not use it), but kerosene is considered a high flash-point solvent. The O-rings in an O-ring chain seal in grease in the pivot areas. The manual states that the O-rings can be damaged by steam cleaning, wire brushes, high-pressure washers and certain solvents. "Damaged O-rings or contaminated grease in the pivot area will shorten the drive chain service life".
I usually wipe a chain with just a dry rag before oiling it. That tends to remove quite a bit of the grime. If it is still quite dirty, and I have time, I'll use kerosene and a soft tooth brush (and rags) to further clean it. Cleaning a chain with kerosene and a tooth brush is a messy job, so I wear disposable gloves and old clothes and spread cardboard or newspaper to protect the floor. I also use a piece of cardboard to help reduce splattering of the brake disk and tire. After cleaning the chain, wipe it well with a rag right afterwards and then again after the bike has sat for a while. Afterwards, when the chain is completely dry, lubricate it well. You can lightly wipe off excess chain lube (oil) to limit the amount of lube (oil) that get flung off the chain while riding. Clean the rear brake disk with brake cleaner before riding or using the rear brake. Clean up any other splatter with a rag. I will continue to use kerosene to clean my motorcycle O-ring chains unless the manufacturer (bike or chain) specifically states not to use it.
On the majority of motorcycles with chain final drive, chain slack is adjusted by loosening the axle nut and then using the adjusters on either side of swingarm to move the axle forward or backward an equal amount to increase or decrease the amount of slack. If your motorcycle has a single-sided swingarm, then the procedure will be different. There are adjusting marks on either side of the swingarm if there are screw-type adjusters to aid in proper alignment. Some motorcycles have “snail type” adjusters which make the alignment process easy. Don’t use the snail type adjusters to move the axle as that could cause wear to the pin that the notches in the adjuster align with; instead, hold the adjuster in position and move the wheel back then forward. The adjustment marks / axle position on both side of the swingarm must be the same so that the wheel is aligned correctly with the direction of travel. The wheel should be pushed forward against the adjusters before checking the slack and tightening the axle nut. The axle is then tightened somewhat and the chain slack is checked again, and if not correct, the process is repeated. Finally, the axle nut is torqued to specification.
While you’re at it, check the chain slider (swingarm protector) and chain guide and chain guide slider for damage and excessive wear. You don’t want to completely wear through the chain slider (on the swingarm) because the chain will then cut into the swingarm.
Sprockets
Check for excessively worn or broken sprocket teeth. Replace as needed or when the chain is being replaced. The general rule is to replace the sprockets and chain as a set. The reason being that if they are not all replaced at the same time, then the worn parts will cause accelerated wear of the new parts. Note that the front sprocket tends to wear faster, and some riders will replace the front sprocket alone, and I see nothing wrong with that. The front sprocket is usually the easiest and least expensive part to replace: neither the chain nor the wheel needs to be removed on most bikes in order to replace the front sprocket. Some riders also swap front sprockets back and forth to change the final gearing for different riding situations; this is more common among dual sport riders.
If the chain needs to be replaced, then replace the sprockets at the same time. If you're only replacing a single sprocket, and the chain still has lots of "life" in it, then I wouldn't replace the chain (under normal use) at that time. However, if you need to replace a sprocket, and the chain has worn significantly (has required a lot of adjustment; doesn't have many km left in it), but even if it still has some "life" in it, I would replace the chain and both sprockets.
Drive Belt
Refer to your owner’s manual or service manual for maintenance information.
Drive Shaft
Refer to your owner’s manual or service manual for maintenance information.
Next: Suspension, Fuel System, Cooling SystemPrevious Page
Back to Page 1
Back to list of Common Maintenance Tasks