Introduction to Motorcycle Maintenance - Page 8
Page Last updated: May 15, 2025
Engine Oil and Oil Filter
2012 Honda CBR250R Oil and Filter Change (Applies to CRF250L, CRF300L, CBR300R)2020 Kawasaki KLX140 Oil and Filter Change
This section was written mostly in regards to 4-stroke engines, but some points may apply to some 2-strokes engines. 2-stroke engines derive lubrication from the mixing of oil with the gas it consumes; either the oil is premixed with the gas or there is an oil injection system. A 2-stroke engine burns oil by design. There may be separate lubricating oil for the transmission. In 4-stroke engines, the lubricating oil is separated from the combustion chamber (though small amounts of oil may bypass the piston rings and valve seals).
Regular oil and oil filter changes are necessary for long engine life and reliability. Consult your owner’s manual or service manual for service frequency and the specific procedure for your motorcycle. Use motorcycle specific engine oil of the correct viscosity. I always use OEM oil filters (these are usually disposable paper type, cartridge or spin-on).
Do not overfill your engine with engine oil. If you accidently do, then remove some by either sucking some out with a syringe through the oil filler hole, or carefully draining out some through the drain hole. If the engine is over-filled with oil, it may become aerated (full of air bubbles) reducing its lubricating efficiency as a whole as well as increasing the crankcase pressure leading to leaks.
Some oil drain bolts have a magnet in them to attract steel/iron bits or filings. Your bike may come from the factory with a magnetic drain plug. If it doesn’t, you may want to consider getting one or possibly using an oil filter magnet. The oil filter will remove most of the metal bits in the oil, but it may not remove the really tiny ones.
When you’re about to change the oil on your motorcycle, warm up the engine first. Actually, riding the motorcycle just prior to changing the oil is even better. Exercise caution if changing the oil when the engine and exhaust are hot so as not to burn yourself. Warming up the engine first will help the oil to drain easier, but more importantly, the sediment in the engine will be resuspended in the oil so that it drains out with the oil. Riding the motorcycle just before changing the oil will help to resuspend sediment in the transmission and that part of the crankcase.
Used engine oil is toxic, so wear disposable gloves. Also, dispose of used motor oil in a responsible manner: take it to a recycling facility.
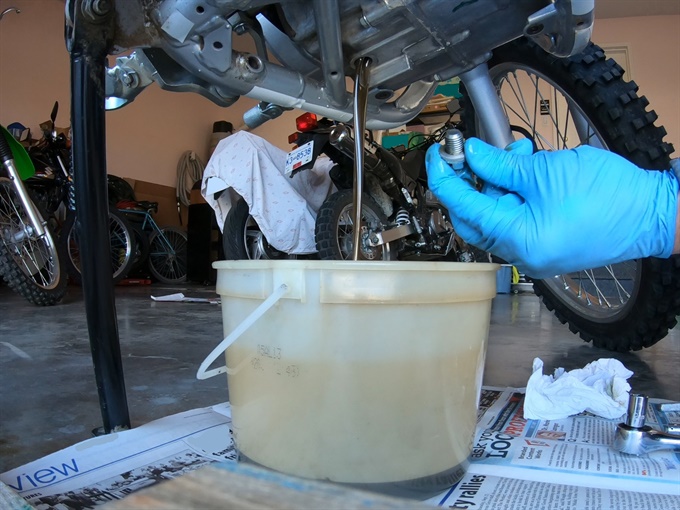
Prepare to make a mess, especially if changing a cartridge type of oil filter. Spread out cardboard or newspapers on the floor under your motorcycle. To drain as much oil as possible out of your engine, tip the bike to both sides; do this before removing the oil filter.
Before reinstalling the drain plug, clean it and the sealing surface. Don’t forget the drain bolt sealing (crush) washer (they can often be reused, or use a new one). Use a torque wrench on the oil drain plug/bolt. Consult your owner’s manual or service manual for the proper torque value.
Before installing a new oil filter, I like to pour fresh engine oil into it to prime it somewhat; some people say not to do this because the oil has not been filtered. I would think that new oil right out of the bottle is likely cleaner than it will ever be, but I suppose there is a chance of contamination. There are some videos on Internet where tests were done comparing prefilled and dry oil filters on engine wear (oil was then analyzed by a lab). Some tests indicated that it is beneficial to prefill oil filters (less engine bearing wear). Another experiment indicated that it didn't make a significant difference whether you prefilled the oil filter or not (engine bearing wear was about the same). What may be more important with regard to engine wear is to limit the amount of load on an engine especially when it is not at operating temperature.
If installing a cartridge type oil filter, make sure you install it the correct way (if installed backwards, you may ruin the engine). Make sure that any O-rings or gaskets are in good condition and in place. Do not excessively tighten the oil filter cover bolts; it is easy to strip the threads in the engine case. An accurate torque wrench is a good idea (see service manual). Consult your owner’s manual or service manual for installing a spin-on oil filter if applicable.
After completing the oil and oil filter change, and adding the correct amount of oil, run the engine at idle speed for a couple of minutes at least to circulate the fresh oil, and then check the oil level according to the method in your owner’s manual. Add additional oil if required (up to, but not over the upper fill line). Note that the method for checking the oil level varies from motorcycle to motorcycle. Some bikes have an oil level sight glass, while others use a dipstick in either the engine or in the frame. For bikes with a dipstick, you may have to screw the dipstick in all the way or not at all. Some motorcycles may have an external oil tank.
Spark Plugs (and fueling)
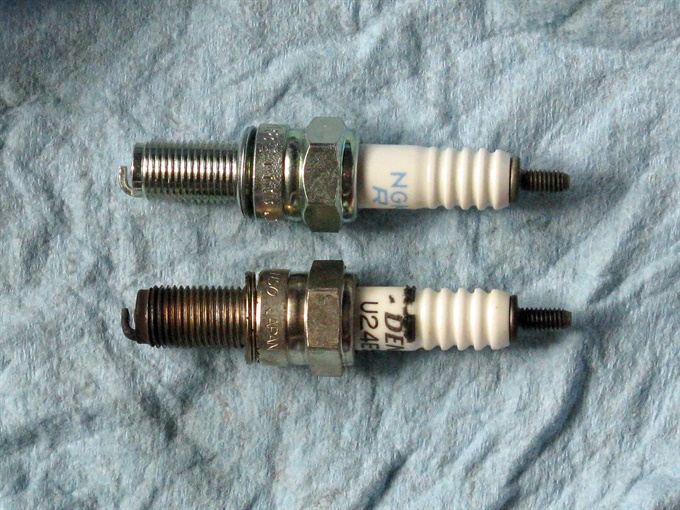
Spark plugs (in combination with other parts of the ignition system) generate the spark to ignite the air-fuel mixture in the combustion chamber of the engine. That air-fuel mixture results from the mixing of air and gas in the carburetor or throttle body (if fuel injected). A motorcycle engine may have one or two spark plugs per cylinder. Spark plugs “wear out” or erode over time and will need to be replaced. Removal and examination of the spark plugs can give an indication of the operation of your engine, in particular the fueling. A dark to light brown coloured spark plug end is optimal; a very light colour indicates a lean fuel mixture or incorrect ignition timing, and a black, wet or sooty spark plug indicates the fuel mixture is too rich. A lean fuel mixture means too much air for the amount of gas in the mixture, and a rich fuel mixture means the opposite. An overly lean fuel mixture can lead to engine damage. A lean mixture generates more heat in the engine. An overly rich mixture can lead to fouled spark plugs and carbon buildup in the combustion chamber as well as poor engine performance.
Inspect the insulator of the spark plug for damage. Inspect the spark plug cap(s) and spark plug wire(s) as well.
Before removing a spark plug, remove the spark plug cap (do not pull the wire), and clean around the spark plug so dirt does not fall into the engine. An air compressor is useful to blow the dirt away from around the spark plug before removal. A vacuum cleaner can also be used to suck up the dirt around a spark plug. When installing a spark plug, make sure the seating surfaces are clean and then insert the spark plug into the engine and hand tighten before torquing to specification.
The spark plug gap, the space between the spark plug electrodes, can be measured and often adjusted (non-iridium type) with a spark plug wire gauge tool. Spark plug electrodes (non-iridium type) can often be cleaned with fine emery cloth or sand paper (make sure there is no grit left on the spark plug, though).
Iridium spark plugs should not be cleaned or adjusted, and if their center electrode is rounded, they should be replaced. When new, the center electrode of an iridium spark plug is pointy (other types tend to be flat).
Refer to the owner’s manual or service manual for information on spark plug(s) for your motorcycle including the type, the gap, and how to tighten them with a torque wrench or without.
Checking and Adjusting the Engine Valve Clearances (4-Stroke Engines)
2022 Honda CRF250F Valve Clearance Inspection2012 Honda CBR250R Valve Adjustment (Applies to CRF250L, CRF300L, CBR300R)
2010 Suzuki DR650SE Valve Adjustment (and spark plugs)
The specific procedure for checking and adjusting the valve clearances may vary from motorcycle to motorcycle. Consult the guides on this website to get an idea of what may be involved. Refer to your service manual for specific instructions for your motorcycle.
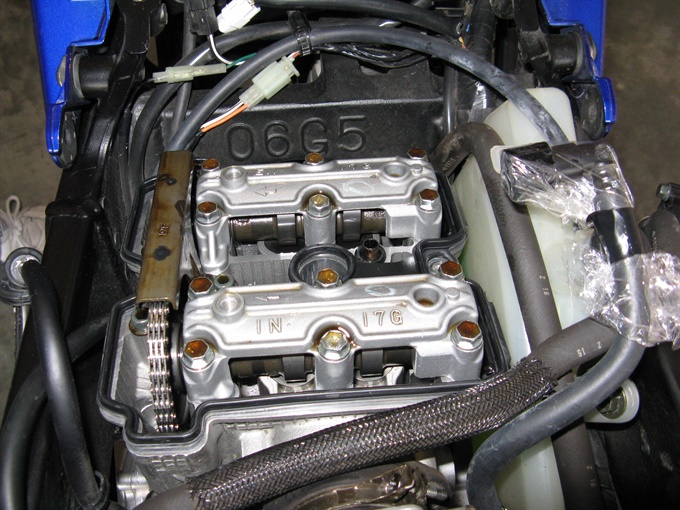
If valve clearances are excessive, increased engine noise may result. If they are extremely excessive there may be a drop in performance. If valve clearances are too tight, damage may occur to the valves or valve seats over time.
In some engines the valve clearances are set by a screw-type adjuster and locknut. Other engines use valve shims (small metal disks) of different thicknesses that are swapped. Some engines require that the camshafts be removed in order to replace valve shims. In some engines, the shims can be replaced without removing the camshafts.
Next: Cleaning, WinterizingPrevious Page
Back to Page 1
Back to list of Common Maintenance Tasks